
Useful information for Foodbanks and donors
What Donation Logger does
Donation Logger gives Foodbank Admin users a self-serve way to upload historical donation records using a structured CSV file. Instead of relying on support teams or manual backend uploads, you can validate your file, correct any issues, and submit the upload directly in Foodiverse.
-
Uploads create donations with a Logged source
-
Logged donations remain separate from live operational donations
-
Successful uploads appear in reporting and donation views
-
Validation happens before donations are created
-
If any row fails validation, the entire upload fails
Before you start
Before using Donation Logger, make sure all of the following are true:
-
You are a Foodbank Admin
-
The Donation Logger feature is enabled for your organisation
-
You have the donation data ready in the approved CSV template
-
You know the correct donor and charity official IDs for each row
-
You understand whether each row is being logged as Actuals or Estimates
Do not try to upload backend-managed values such as donation reference IDs, UUIDs, lifecycle timestamps, product IDs, or source values. These are created or assigned by the system.
Open Donation Logger
-
Log in to Foodiverse.
-
Open the left-hand navigation menu.
-
Go to the Foodbank area of the platform.
-
Select Donation Logger.
The Donation Logger navigation item appears under Manage Donor temp. schedule and above Foodnet Settings when the feature is enabled for authorised users.
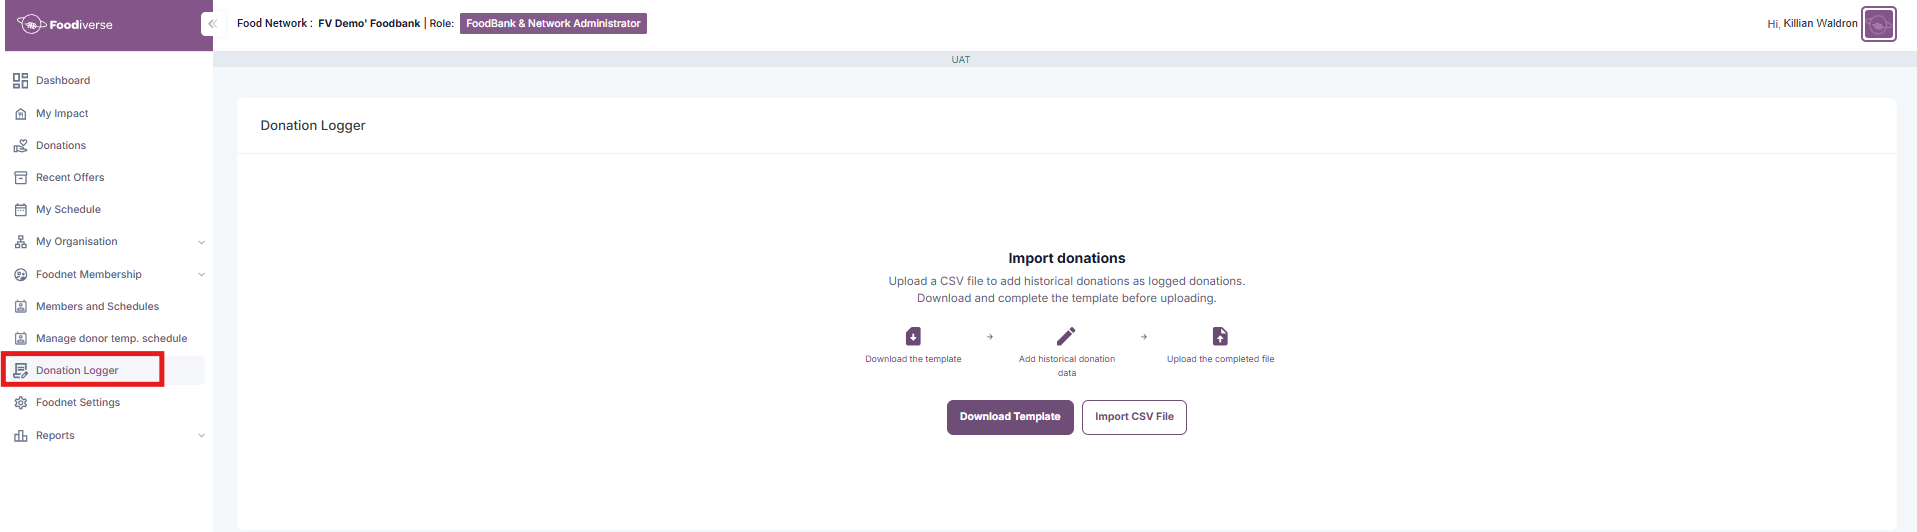
If you cannot see Donation Logger in the menu, check that you are logged in with a Foodbank Admin account and that the feature has been enabled for your environment.
Download and complete the CSV template
On the Donation Logger page, download the template file before preparing your upload. The template is designed to show exactly which fields users should complete.
At minimum, the upload supports donation-level fields such as:
-
donated_at -
donor_official_id -
charity_official_id -
category -
weight_kg -
estimate_actuals
Important rules when completing the file:
-
Use the approved category values and formatting from the template guidance
-
Enter the donation date only where requested
-
Use valid donor and charity official IDs
-
Do not rename columns unless the template guidance explicitly allows it
-
Do not add backend-only fields
The system generates lifecycle timestamps in the background so the logged donation behaves like a normal Foodiverse donation for reporting and visibility purposes.
Choose the Donation Type for each row
The template includes a column called Donation Item Type. Use it to say whether the food in that row is Surplus, Purchased or from a Food Appeal. Type the value exactly as shown, in lower case.
|
To log the food as |
Enter |
|---|---|
|
Surplus |
|
|
Purchased |
|
|
Food Appeal |
|
-
If you leave the column blank, the row is logged as Surplus.
-
Any other value, including capital letters or extra spaces, fails validation. The row is never treated as Surplus by mistake.
-
Non-food is not chosen in this column. It is chosen by the Category.
-
For more about the Types, see Choosing a Donation Type.
Understand Actuals and Estimates
Each row must identify whether it is being uploaded as Actuals or Estimates. This matters because Product Level Detail rules differ depending on the value.
|
Row type |
What it means |
PLD requirement |
|---|---|---|
|
Actuals |
The row represents actual donation data with product-level detail |
PLD is required |
|
Estimates |
The row represents estimated donation data |
PLD is not required |
A single upload file can contain both Actuals and Estimates rows. However, Actuals only aggregate with Actuals, and Estimates only aggregate with Estimates.
Add Product Level Detail for Actuals
If a row is marked as Actuals, you must provide the required Product Level Detail values for that row. Product Level Detail is used to support product visibility in downstream surfaces such as Donations History, Recent Offers, and the View Product experience where supported.
For Actuals rows:
-
PLD is mandatory
-
One product per row is supported for MVP
-
Product values must be valid and complete
-
The system will try to match the product to an existing donor product
-
If no matching donor product exists, the system can create one
For Estimates rows:
-
PLD is not required
-
If PLD is included, the final behaviour depends on the confirmed implementation rules for your release version
If an Actuals row is missing required PLD fields, the upload will fail validation. No donations will be created until the file is corrected and revalidated.
Upload and validate your file
-
Open the Donation Logger page.
-
Select your completed CSV file.
-
Start validation.
-
Review the validation result.
Validation checks the structure and content of the file before anything is created in the system.
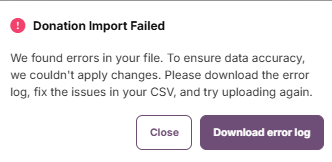
Validation can detect issues such as:
-
Missing required fields
-
Blank or null values
-
Invalid date formats
-
Unsupported category values
-
Invalid donor official IDs
-
Invalid charity official IDs
-
Duplicate rows
-
Duplicate filenames
-
Malformed files
-
Missing or invalid PLD for Actuals rows
Donation Logger uses an all-or-nothing validation model. If one row fails, the full upload fails and no donations are created.
Fix validation issues
If validation fails, review the on-screen feedback and download the error log if available. The error log is designed to help you identify the exact rows and fields that need attention.
Common reasons a file fails:
-
A donor or charity official ID does not match a valid record
-
A category value is unsupported or incorrectly formatted
-
An Actuals row is missing required PLD information
-
Two rows are exact duplicates
-
The same filename was already uploaded within the configured duplicate window
After correcting the file, save it and run validation again.
Confirm and submit the upload
Once your file passes validation, proceed to the confirmation step.
-
Review the summary shown on screen.
-
Check that the file is the correct version.
-
Confirm the upload.
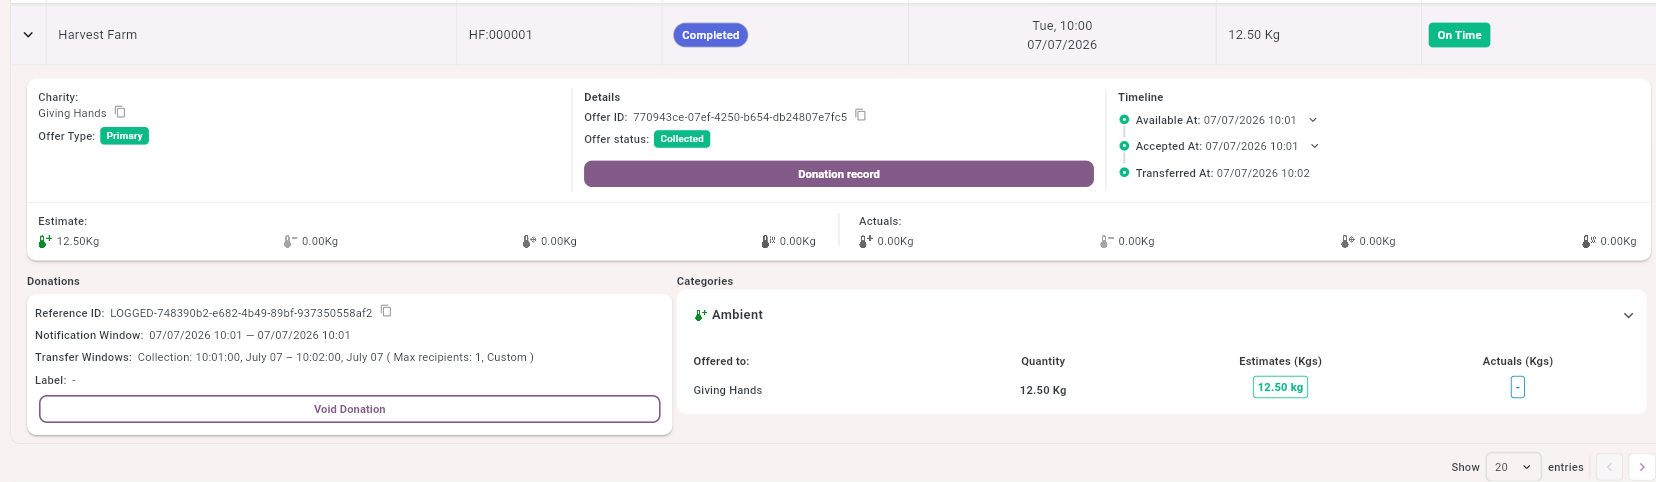
After submission, Foodiverse processes the file and creates logged donations. Each successful donation receives a backend-generated reference ID that clearly identifies it as logged.
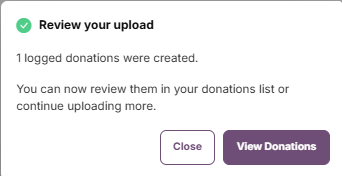
Successful uploads create historical donations that remain distinguishable from live donations while still appearing in core views and reports.
Where logged donations appear
After a successful upload, logged donations should appear in the same key places users already use to review donation activity and reporting.
-
Donations History
-
Recent Offers
-
Impact Summary
-
Branch Impact Reports
Where filtering is supported, reports can distinguish between:
-
Logged
-
Live
-
All
If the Donation Logger menu entry is later turned off, donations that were already created should still remain visible in downstream views and reports.
Good practice for successful uploads
-
Always start from the latest downloadable template
-
Double-check donor and charity official IDs before uploading
-
Keep category values exactly aligned with the template guidance
-
Make sure Actuals rows include all required PLD fields
-
Validate before sharing the file with colleagues as “ready”
-
Avoid reusing filenames unless you are sure duplicate rules will allow it
-
Keep a local copy of both the submitted file and any error log for your records