This is useful information for Foodbanks, Donors and charities.
Description
Foodiverse has the OPTIONAL ability to assign food donations to individuals that are representing charities so that volunteers who do not have a direct association with a charity, can collect food on their behalf and on the behalf of multiple charities. This allows additional opportunities for food banks to schedule collections using its own volunteer network, perhaps when charities have limited resources.
Setting up a 3rd party collector branch
-
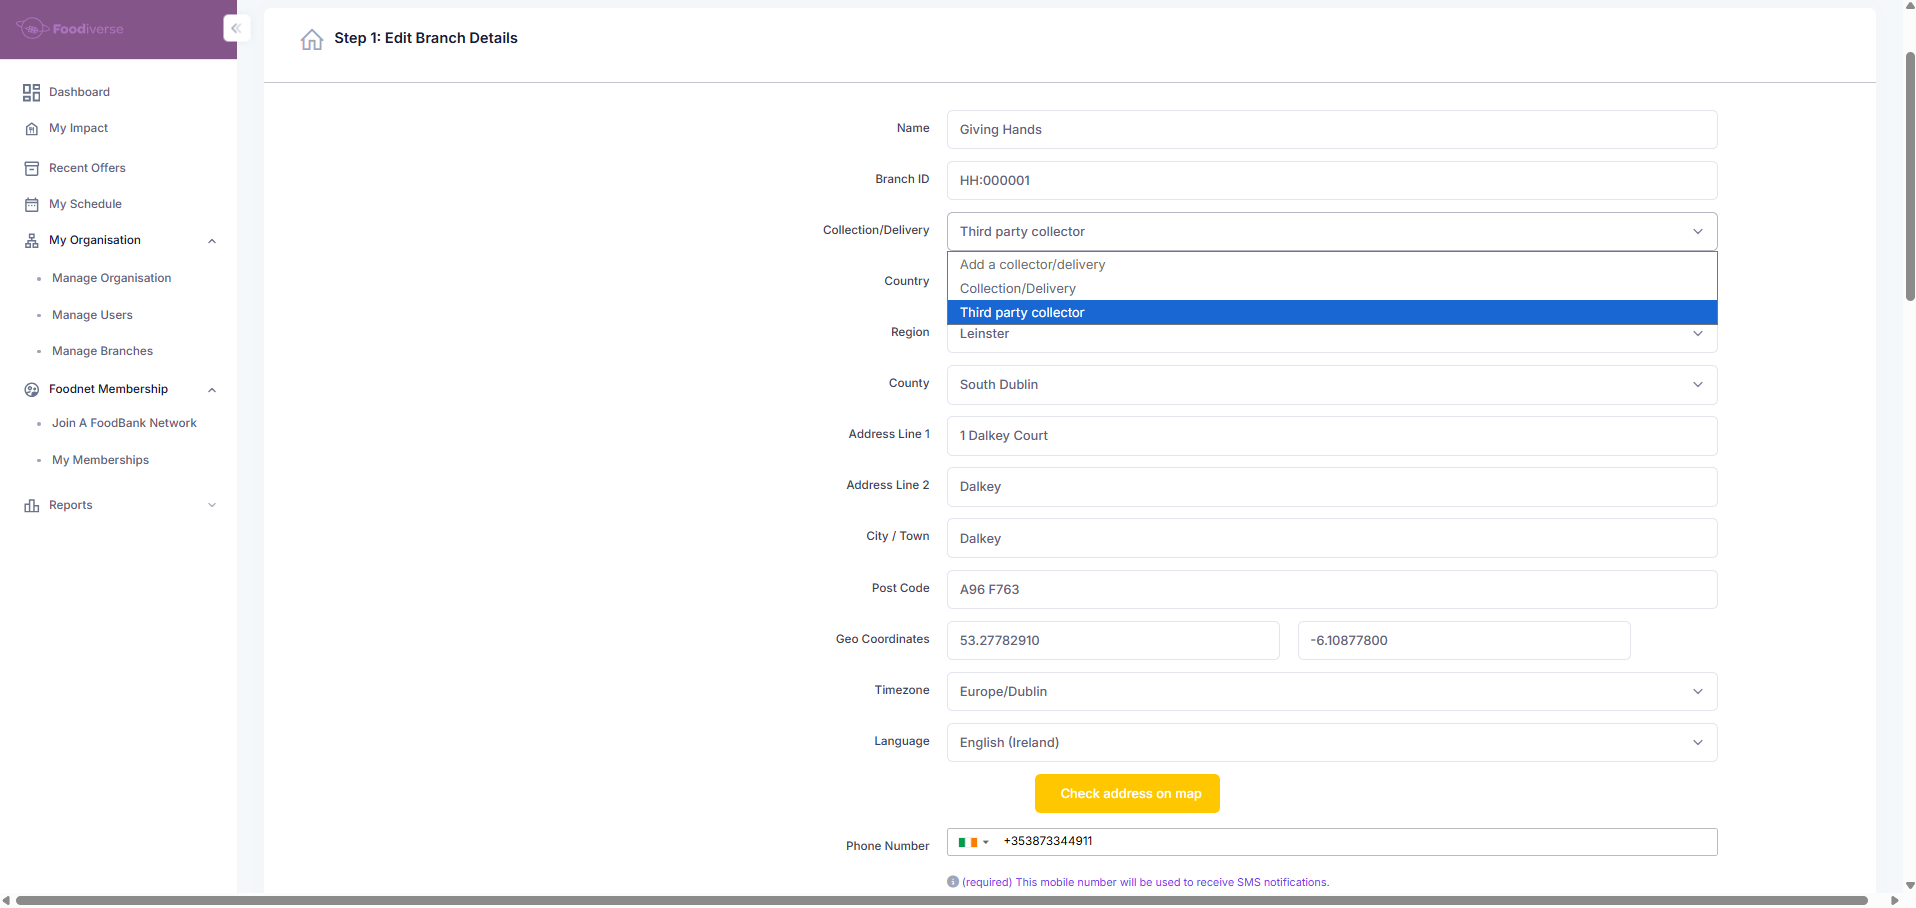
As an charity admin, navigate to My Organisation > Manage Branches > Add New Branch
-
Complete the form, using the ‘Collection/Delivery’ option - Third party collector
Setting up a 3rd party collector user
-
As a charity, navigate to My Organisation > Manage Users > Invite New User.
-
Input the new user’s credentials, making sure to fill out the credentials marked Recommended for Third party collectors & charities.
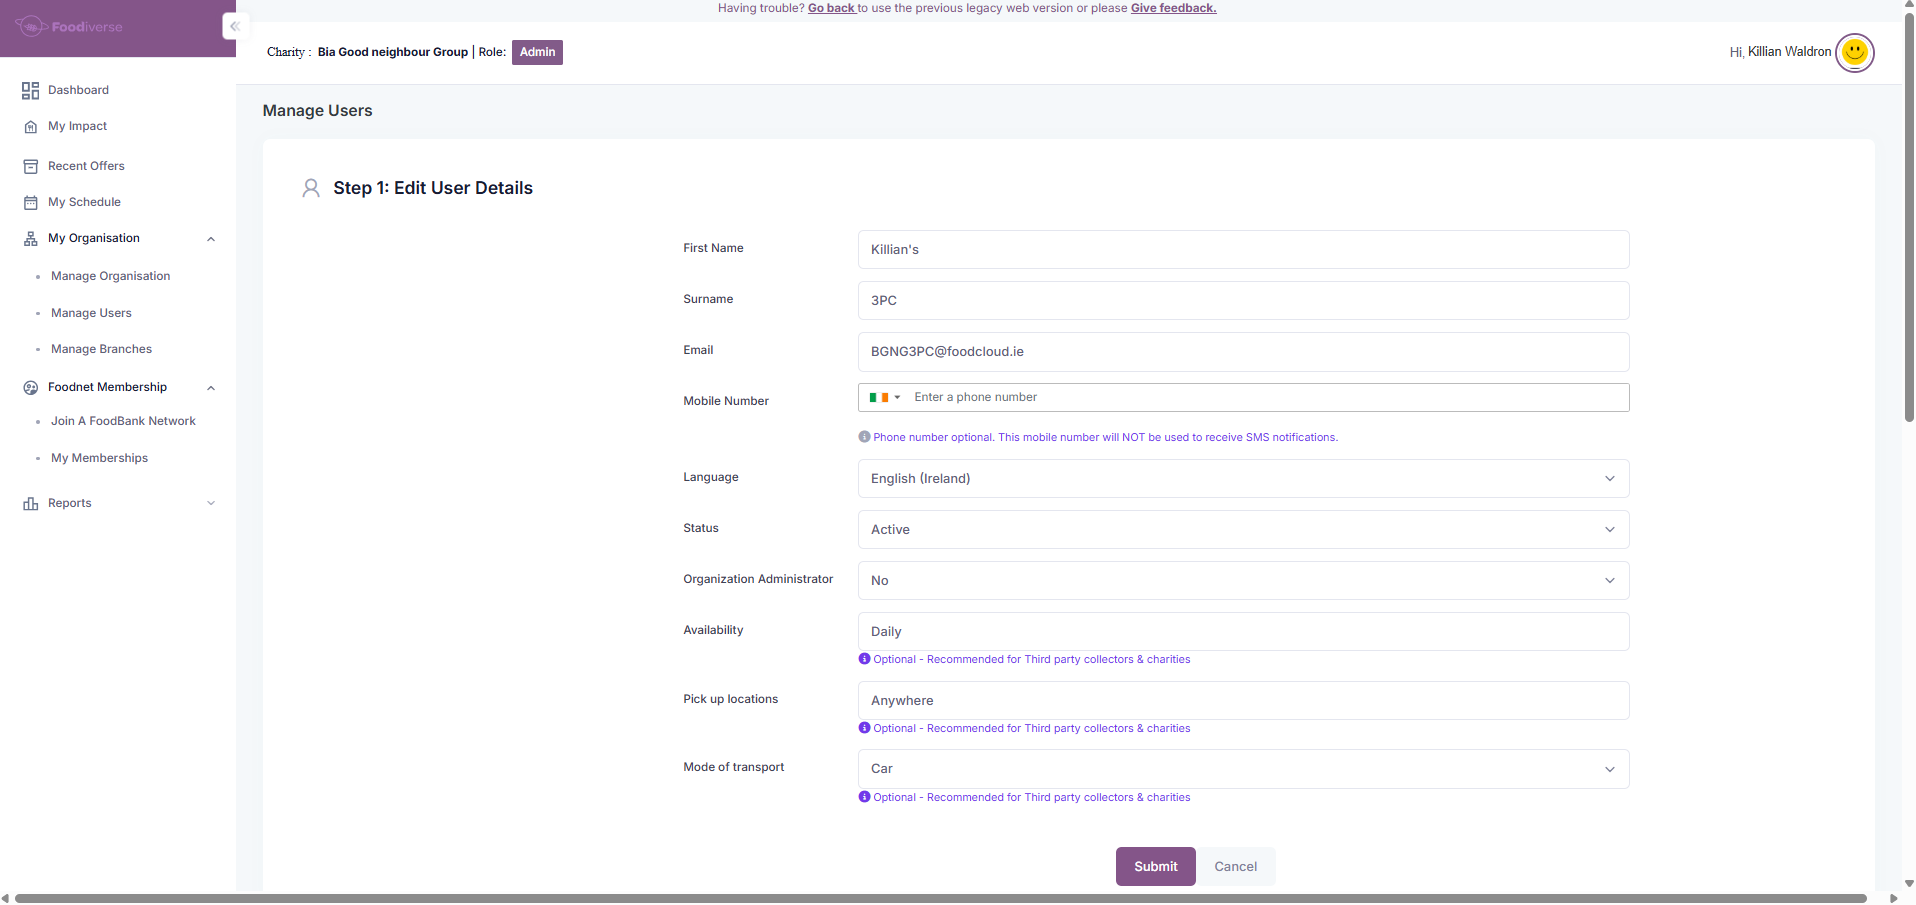
The new user should not be an organisation admin.
-
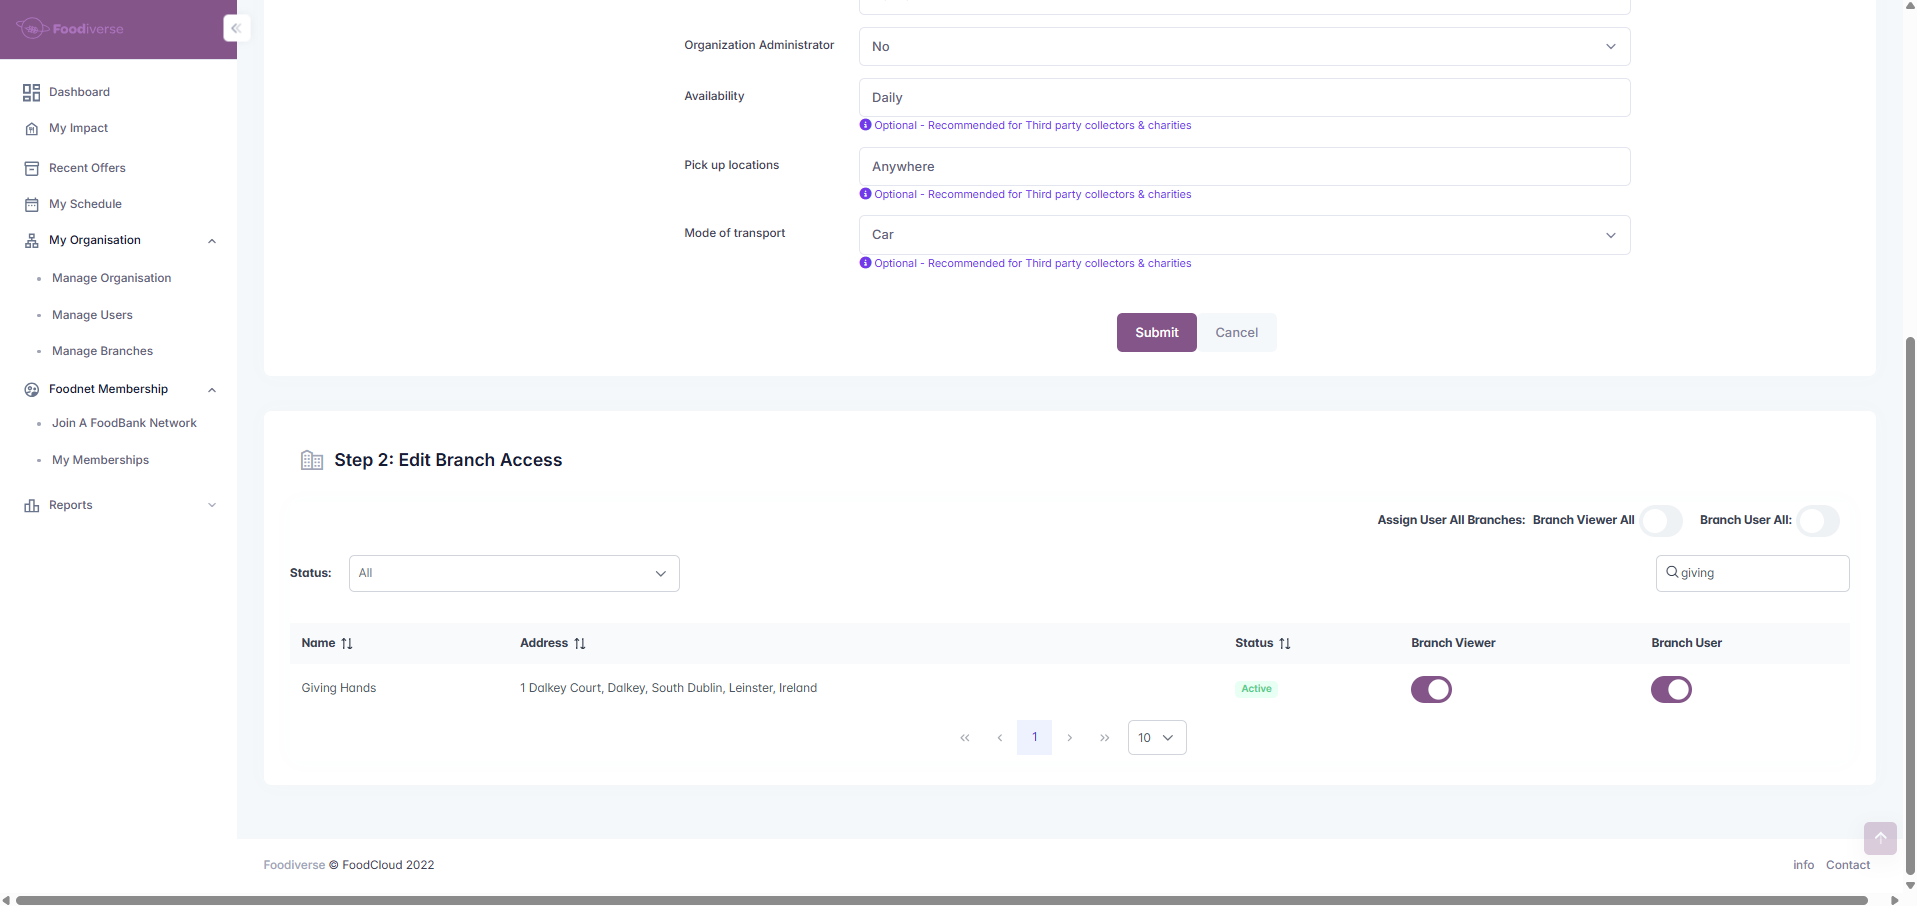
Assign the user to the Third party collector branch
Scheduling
-
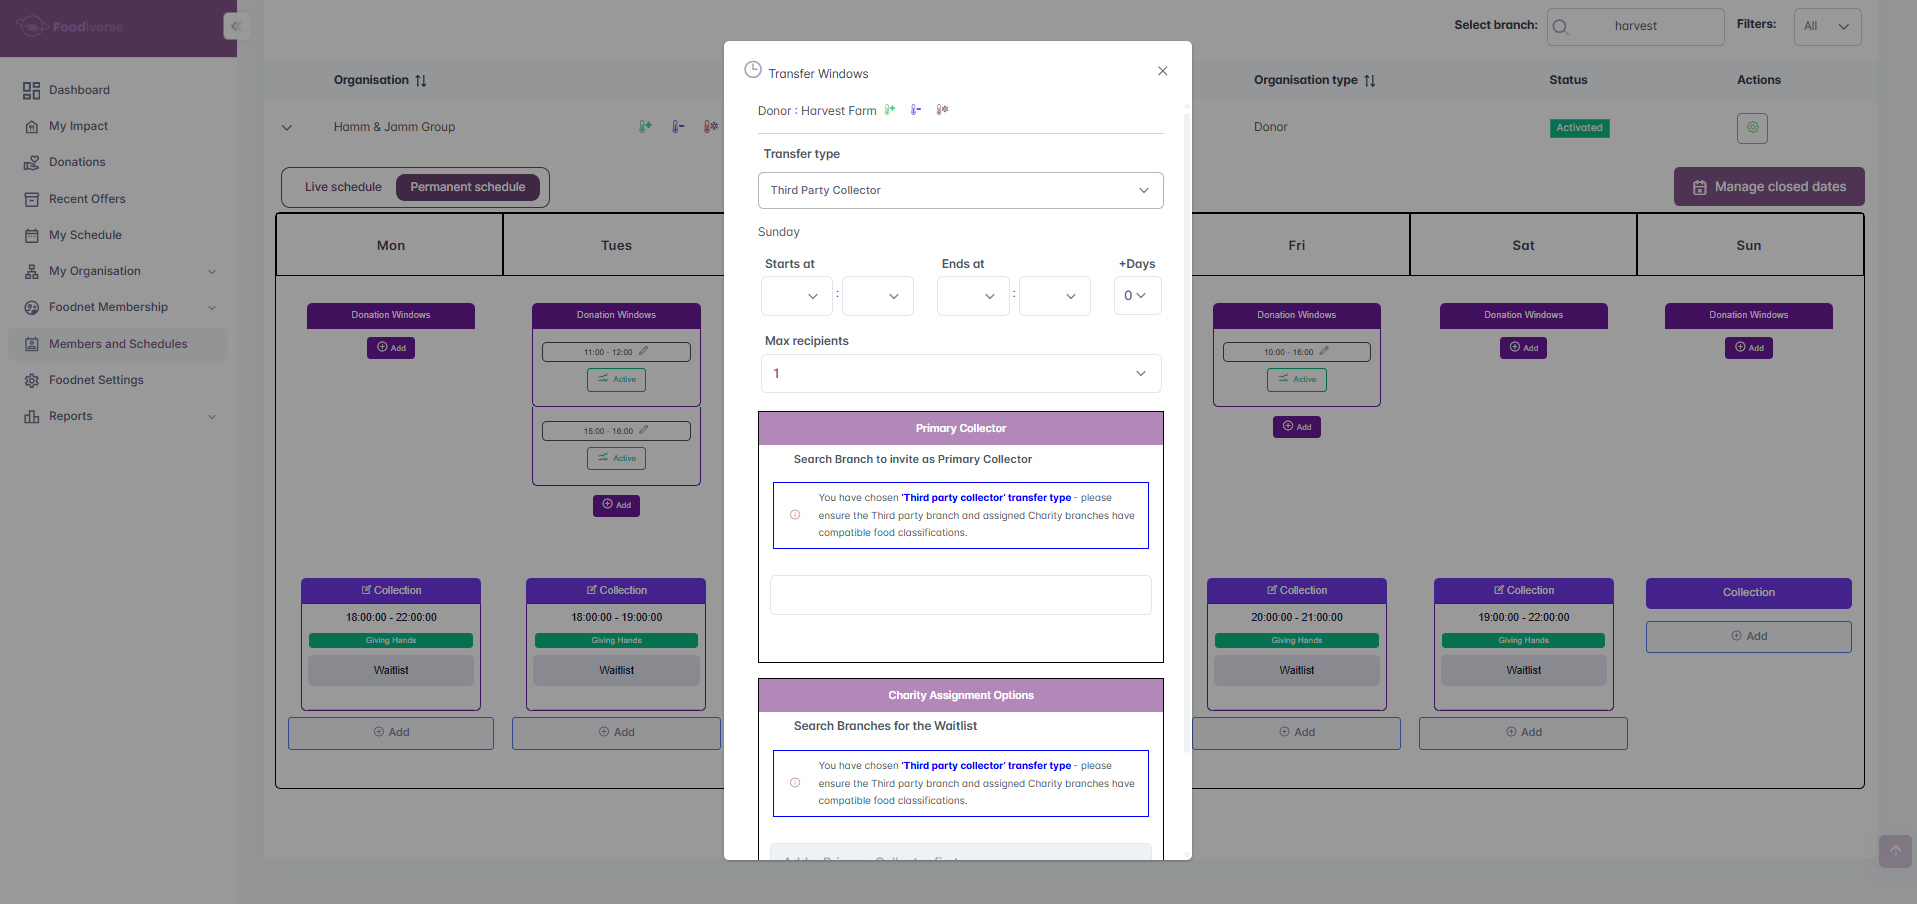
As a foodbank admin, navigate to Members and Schedules -> Search for the donor who’s schedule is changing → Click the '>' → Go to Permanent schedule
-
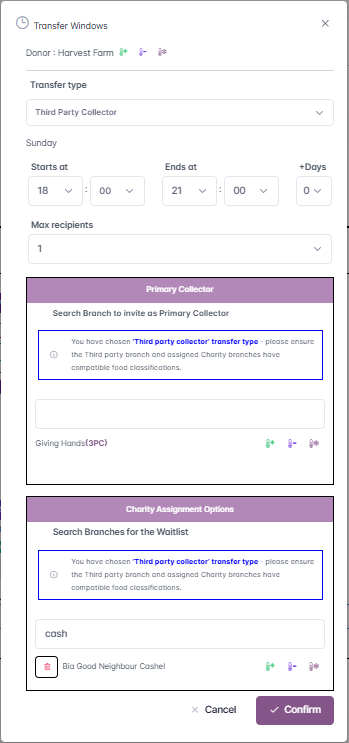
Next, update or create a new schedule using the Transfer type - Third Party Collector
-
Now, add your 3PC branch to the ‘Primary Collector’ section
-
Then, add the charity who will receive the donation
-
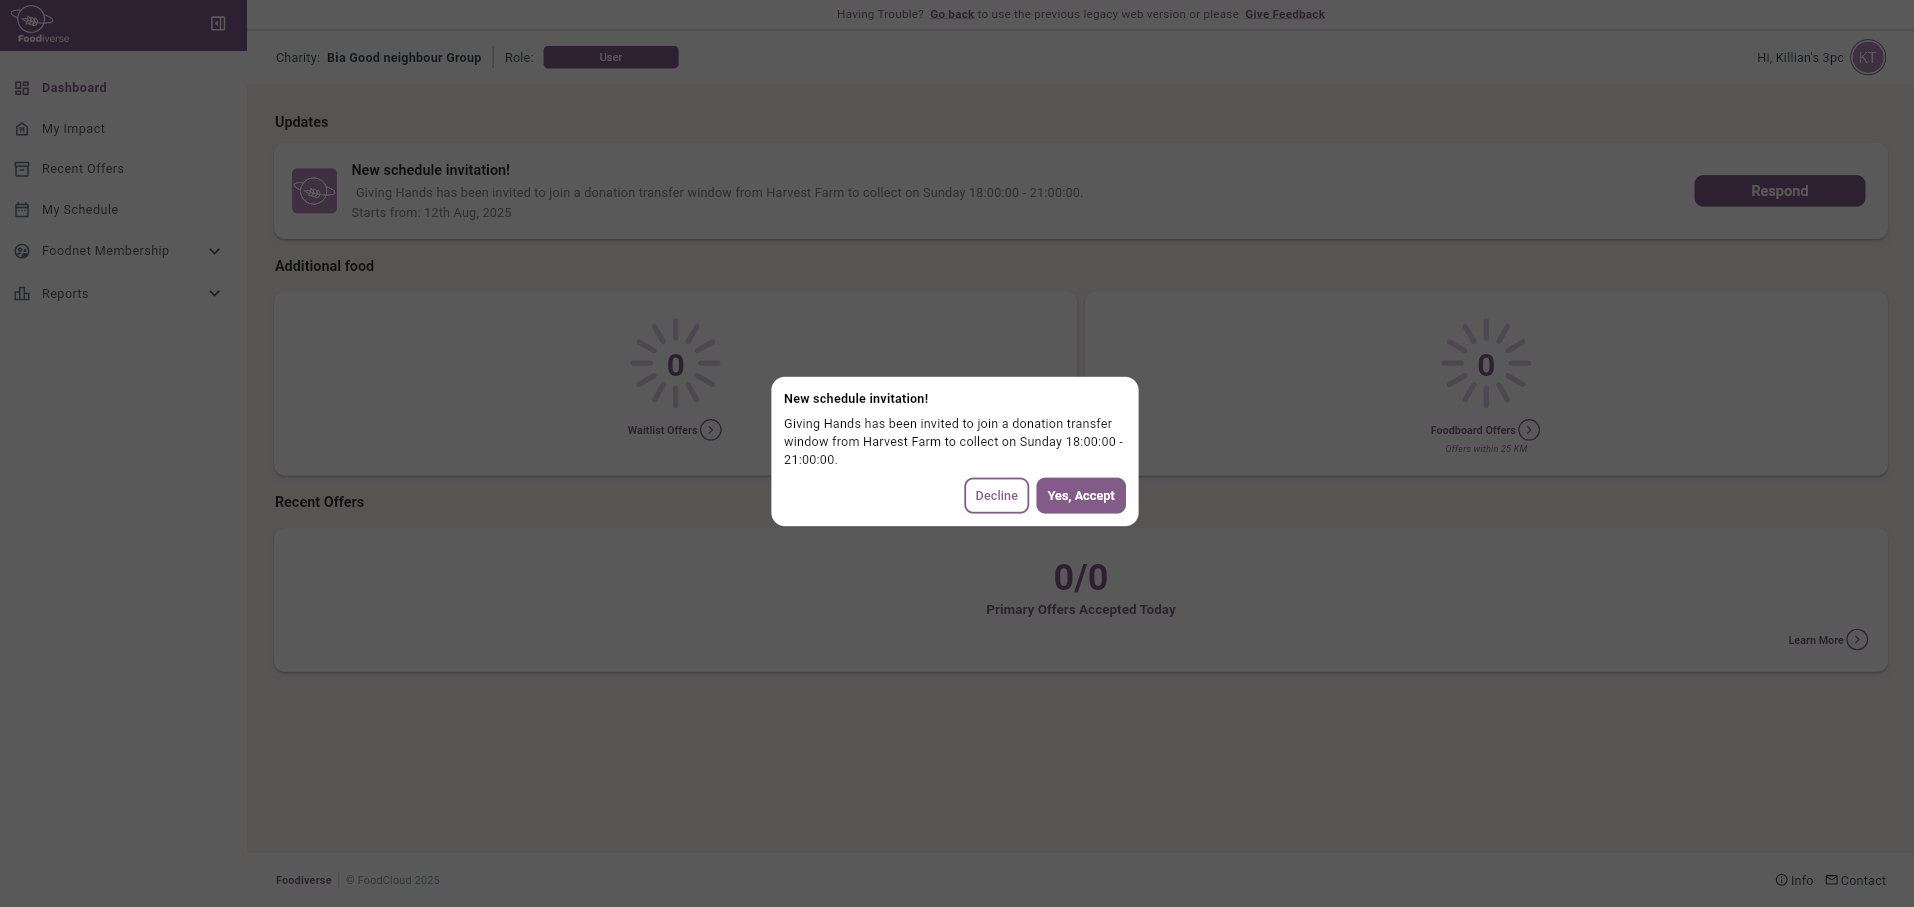
The charity will then accept the slot invitation
-
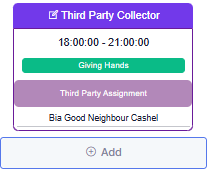
The schedule is now live and ready to be used by the donor
Donation flow for Third Party Collector
-
As the donor, create a donation using the Third Party Collector collection window
-
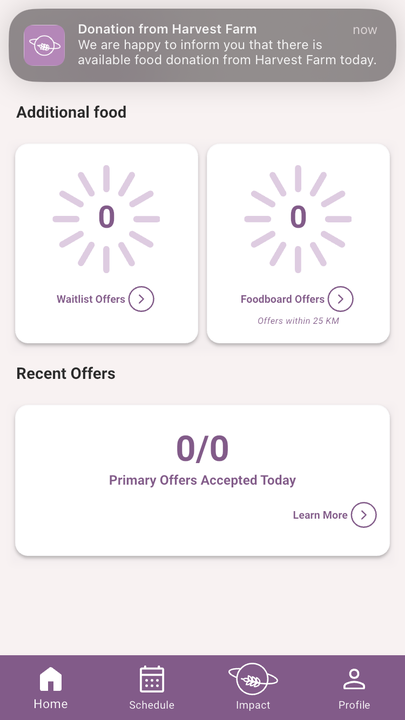
As the charity, you will receive a notification when the donation is posted
-
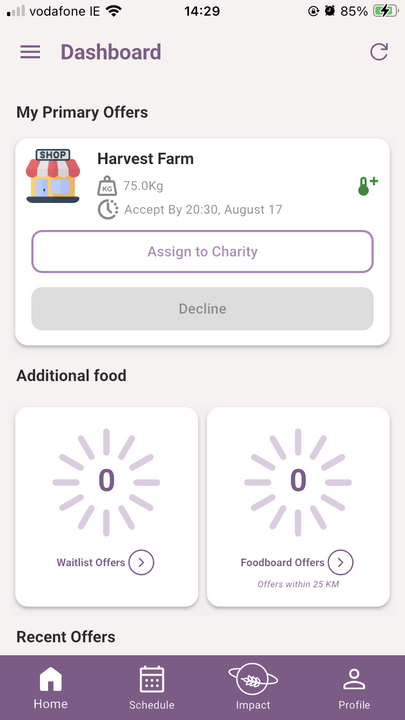
The Third Party Collector branch will press ‘Assign to Charity’ to continue the process
-
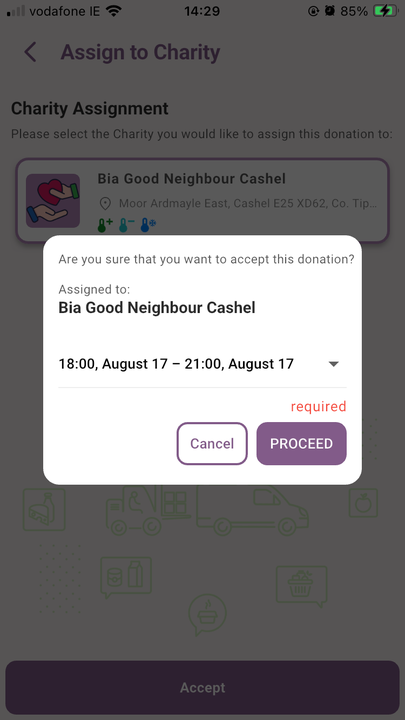
The Third Part Collector will then assign the donation to of assigned charities available by tapping on the charities card
-
Then, press ‘accept’ to accept the donation and press ‘Proceed’ to continue the process
-
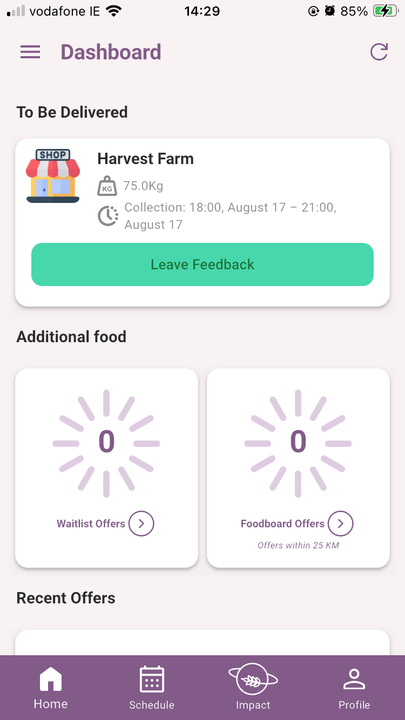
The live donation card shows -
-
The name of the delegated user for the collection
-
The total weight of the donation
-
The collection window for you to collect the donation from the donor
-
-
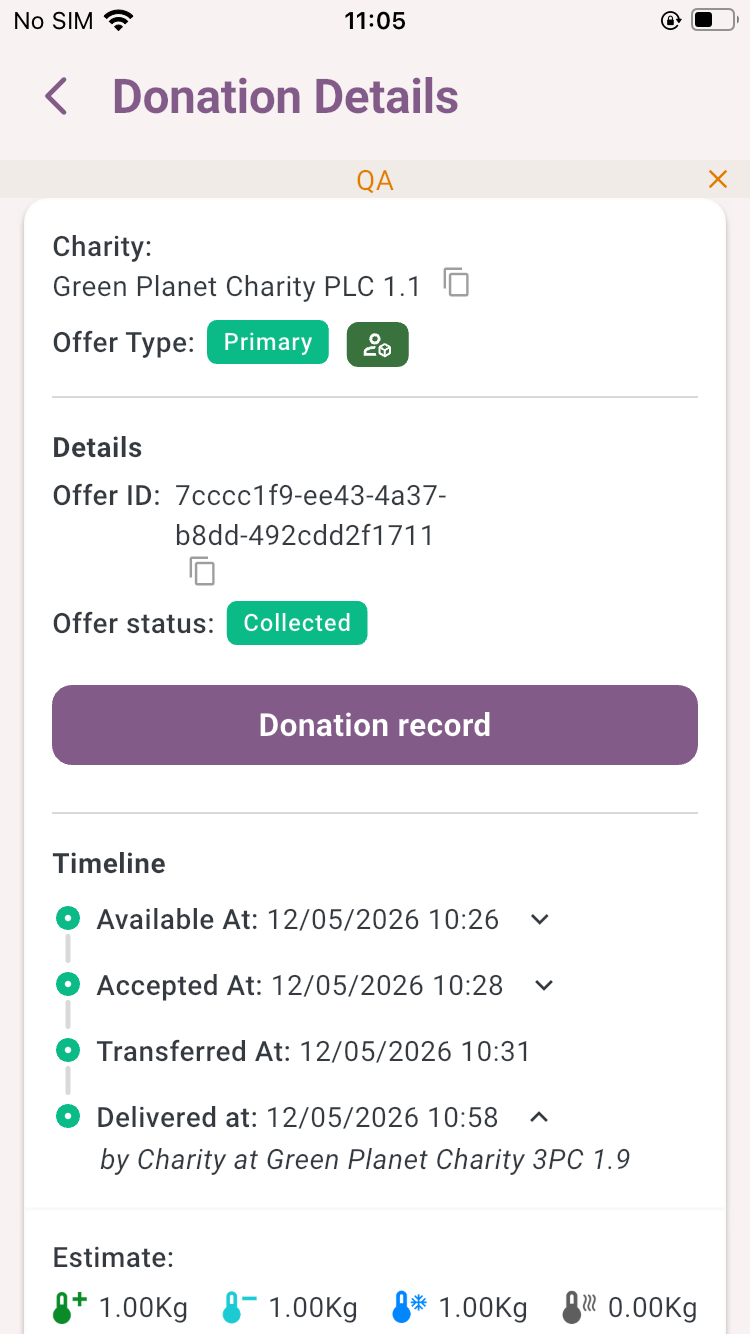
The Third Party Collector charity can click the donation card to view more important details, like -
-
The donor’s name and address
-
The charity the donation is being delivered to' name and address
-
This information may be useful to screenshot if needed.
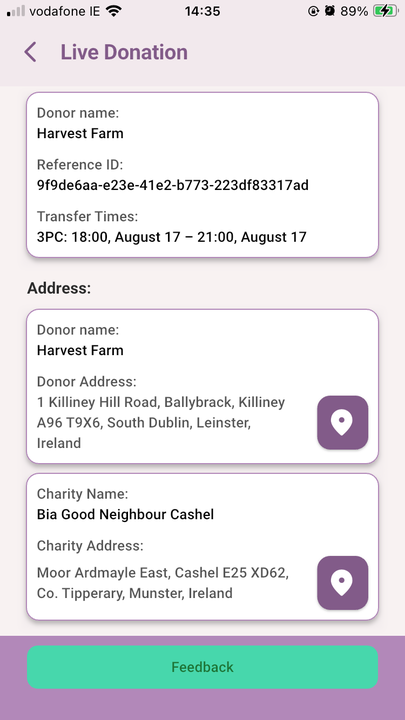
Leaving Feedback is encouraged to help your network admins improve the overall experience of all parties involved
-
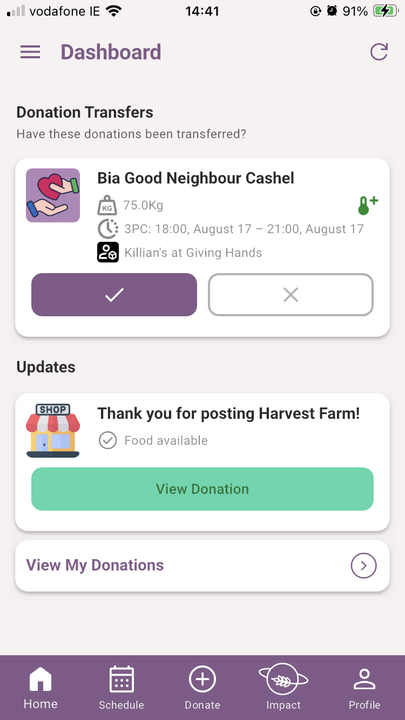
As a Donor, the accepted donation will show at the top of your dashboard under Donation Transfers
-
Clicking the Tick indicates the donation has been transferred
-
Clicking the X indicated the donation was not transferred
-
-
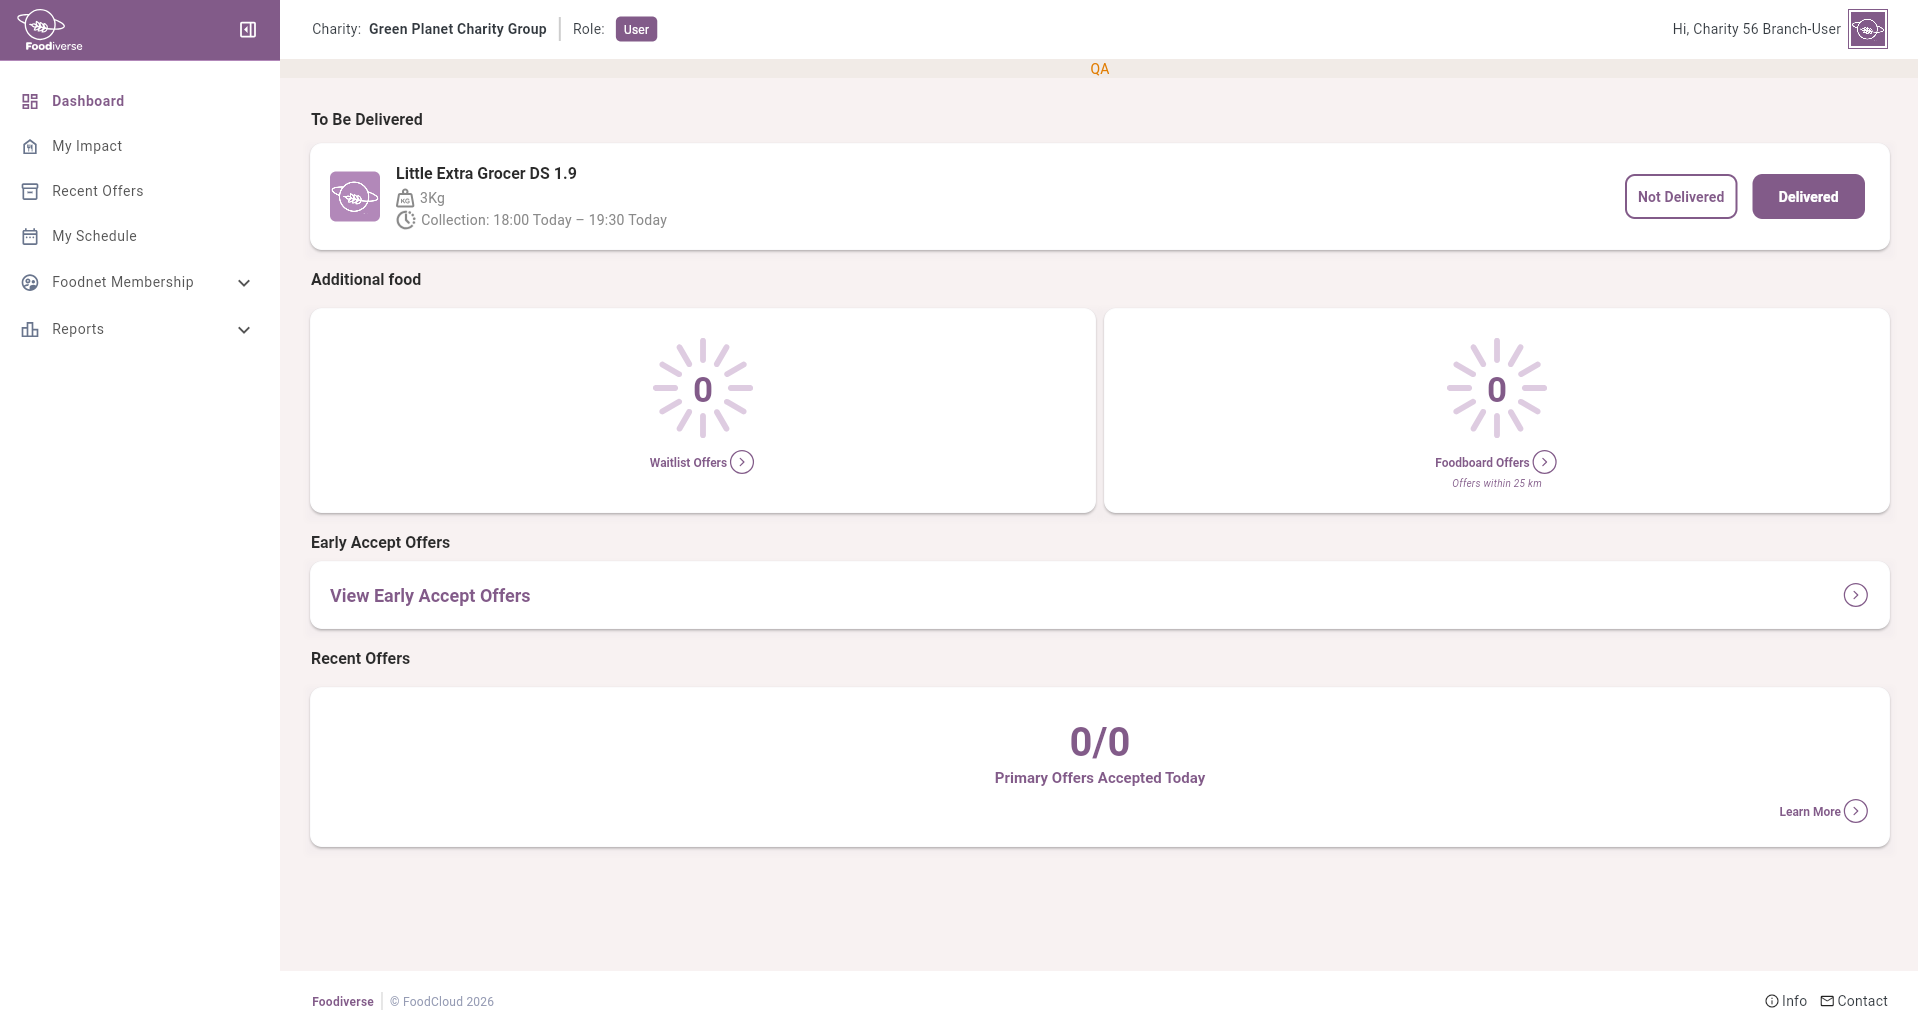
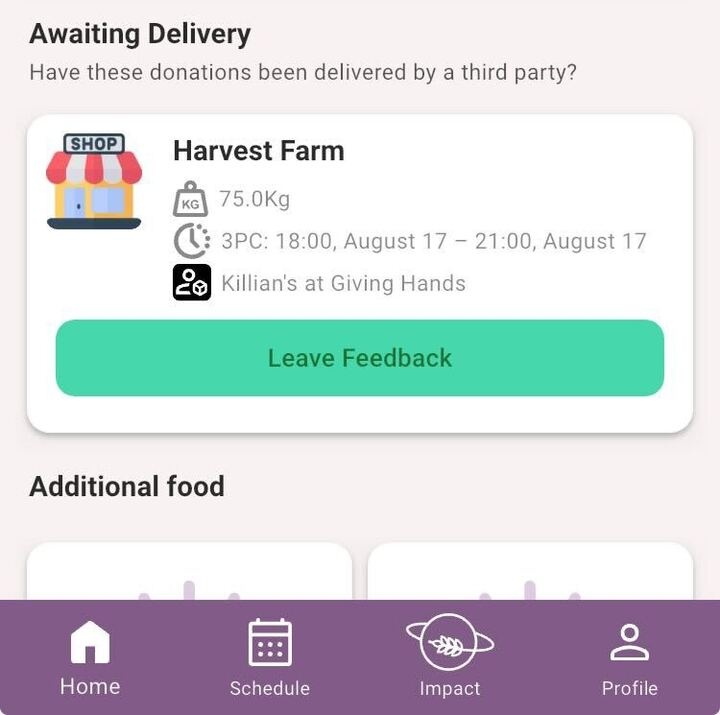
Once the donor has marked the donation as transferred it will disappear from their dashboard. The donations page will look like this -
-
Indicating the donation has been given to the delegated collector, but hasn’t been delivered to the final destination
-
The 3PC branch can then mark the donation
-
Delivered
-
Not Delivered
-
-
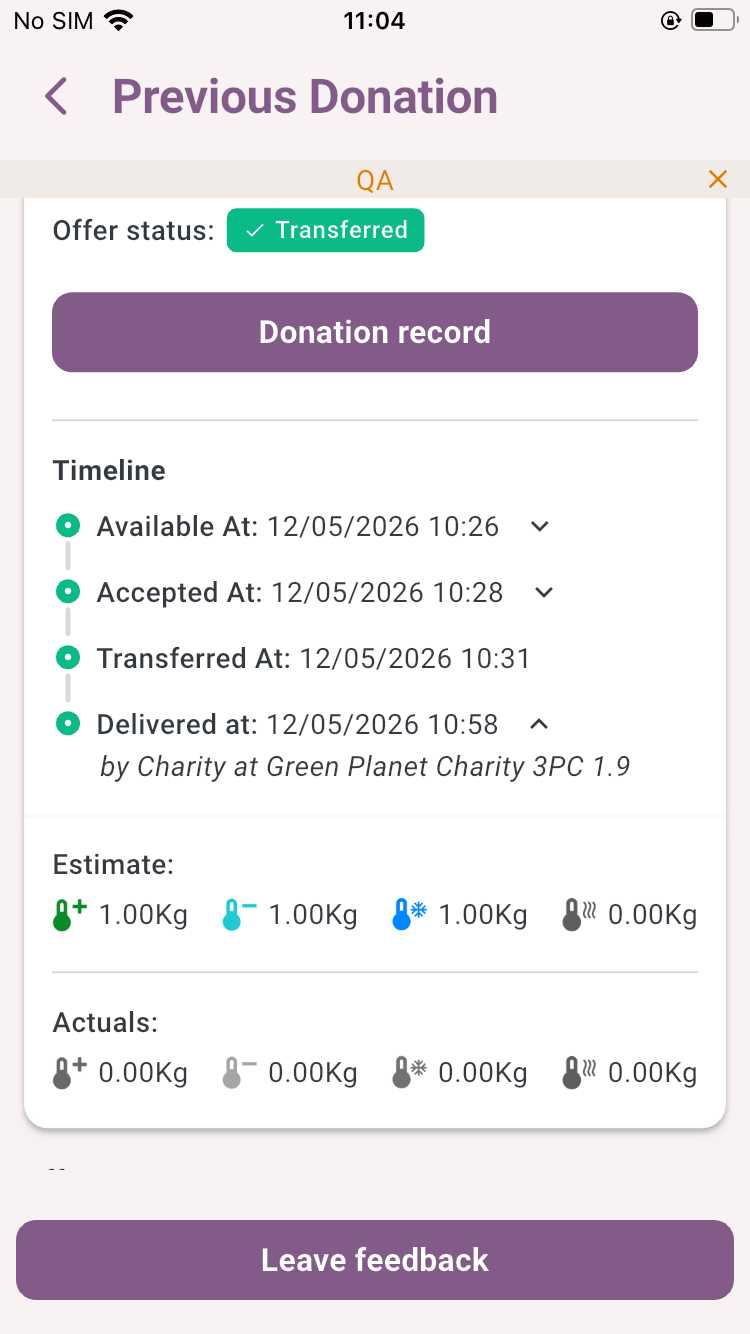
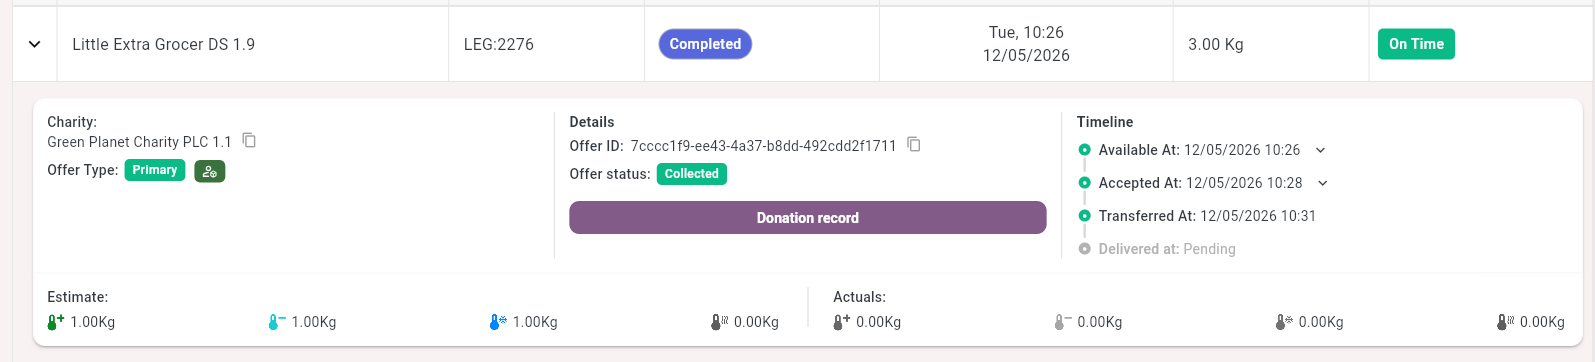
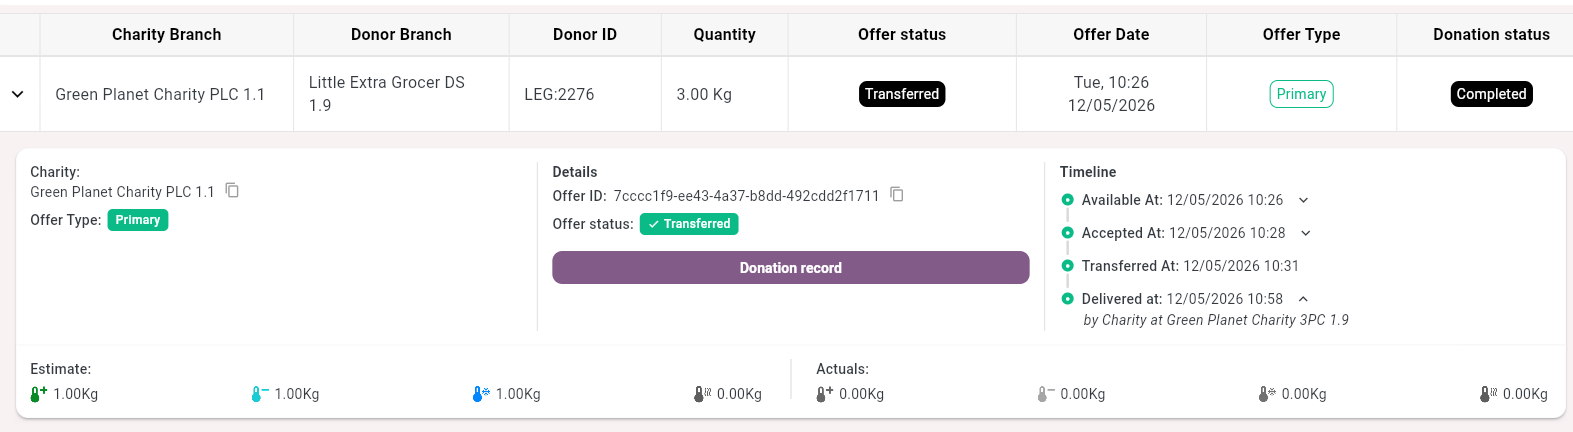
The Donations page & Recent Offers page will now show the complete timeline.
-
Including a delivered at, indicating the time the donation was received by the end recipient
-
-
The charity who the donation was delivered to, can then leave feedback
Donation record
-
The charity can view the donation in Recent Offers
-
The donor can view the donation in All Donations