
Useful information for donor branches and donor organisations.
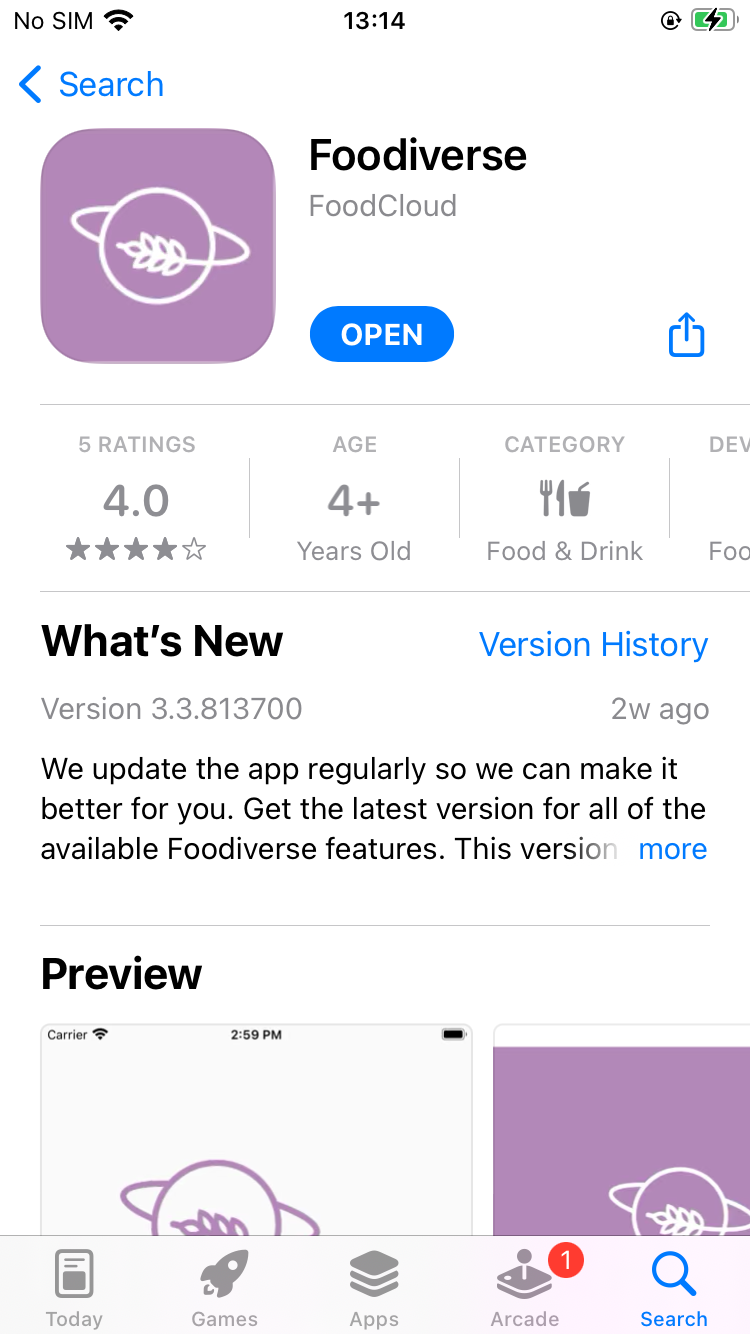
Download the Foodiverse app
Open your devices app store and search for Foodiverse.
You can click the Cloud icon to install immediately or select the app to see more details about the Foodiverse app including the release version.
Once the app has been downloaded and installed on your phone, click on Open.
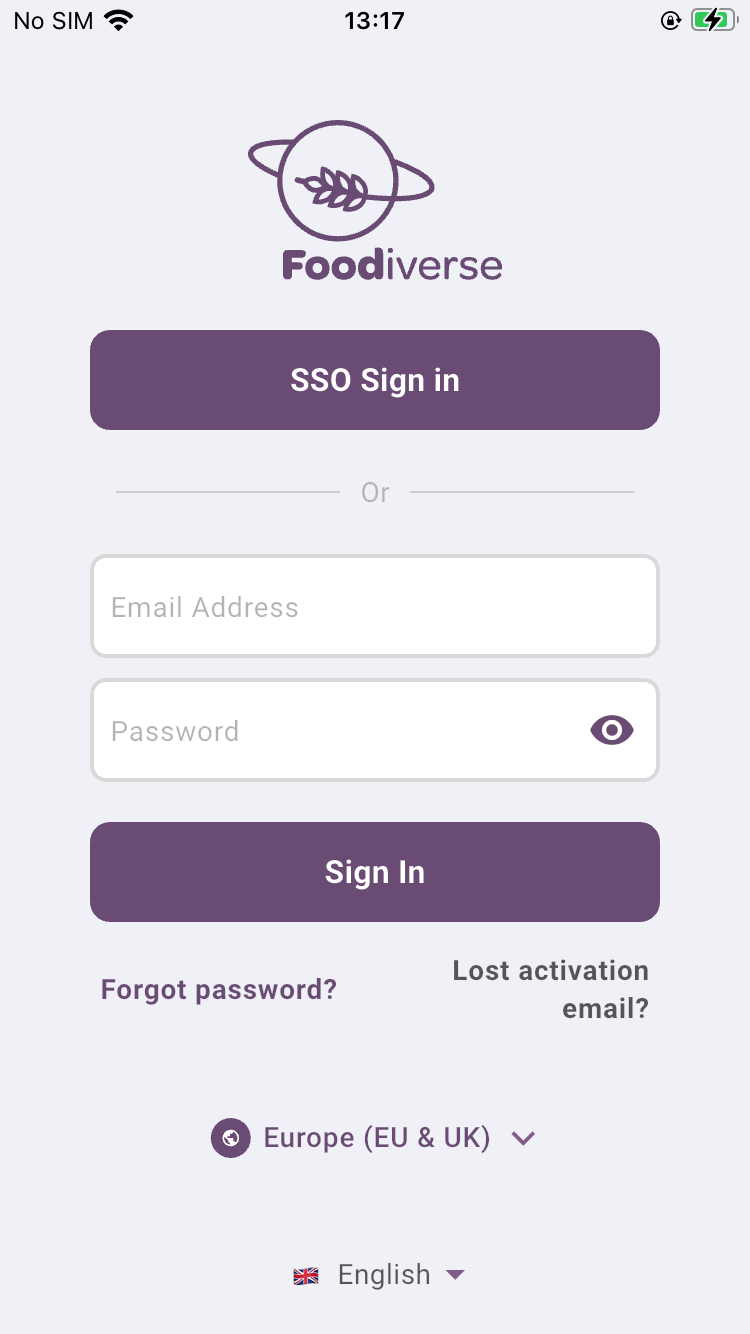
Select Platform and Sign-in on mobile (First-time Users)
Use your Foodiverse login credentials and Sign In.
The credentials will be those with which you registered with on the web app OR those that have been provided to you by your Food Net administrator.
If you are having difficulty with your password (if it contains Upper and Lower case and special characters) you can click the View Password button in the Password field to reveal what you typed.
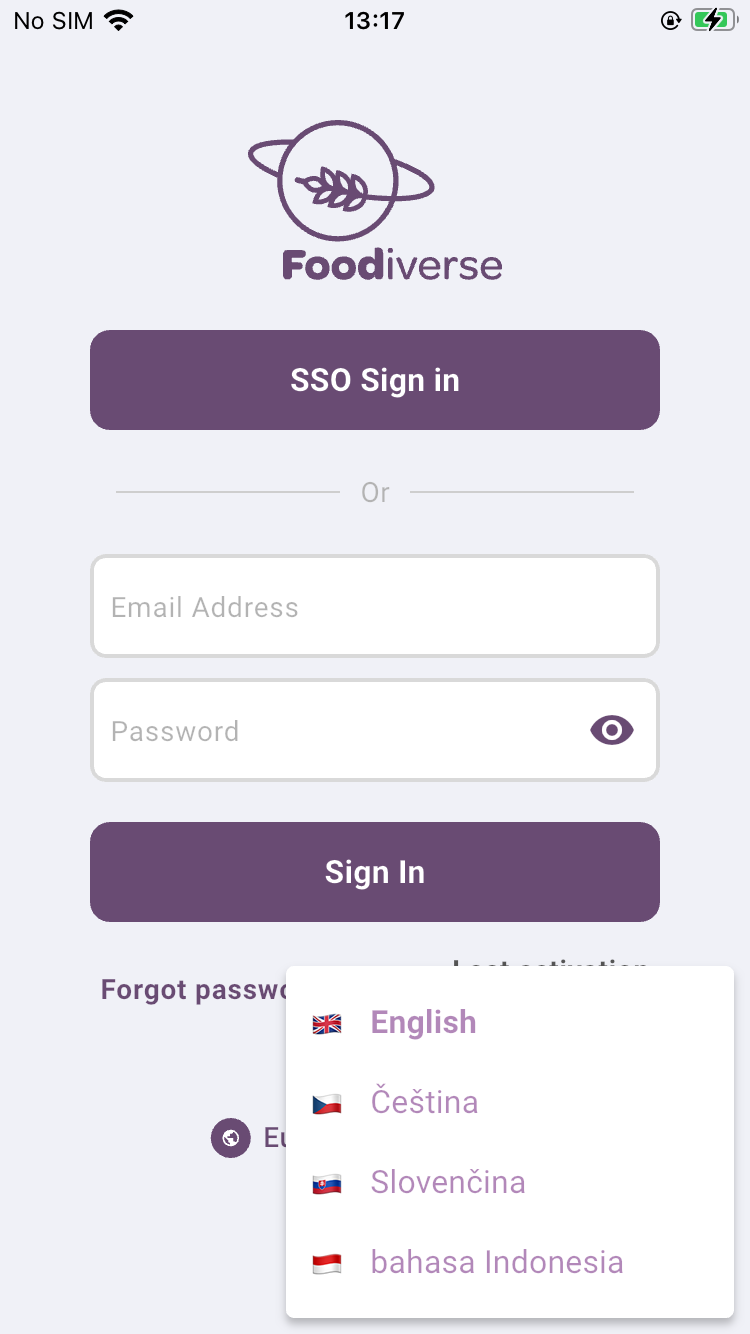
You can change language to one of the supported languages by clicking the language button at the bottom of the screen.
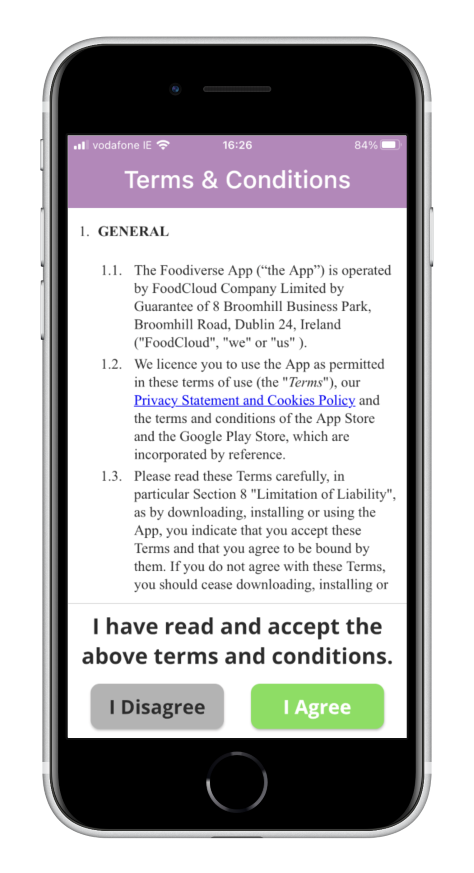
During the first sign in you will be prompted to accept the Terms and Conditions.
Please read the Terms and Conditions and select I Agree to use the app.
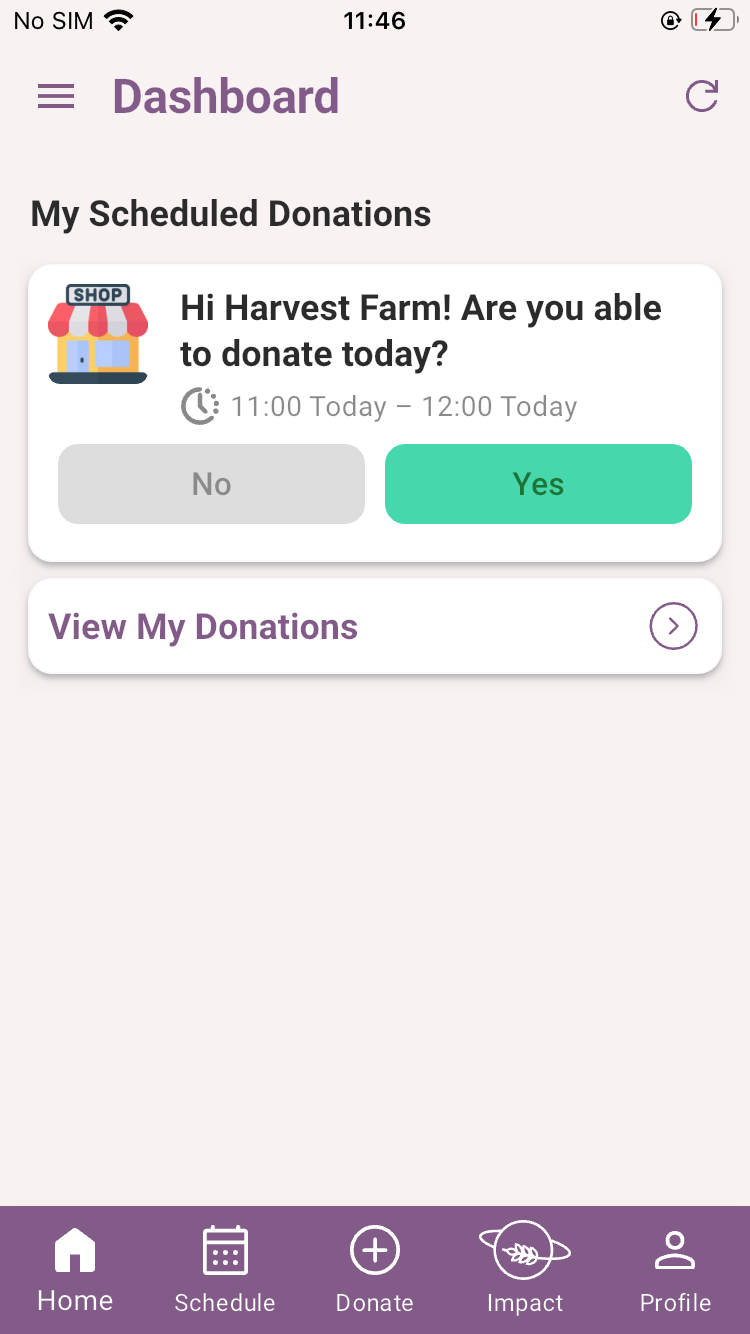
Home Page
When you Login to the Foodiverse mobile app the Home Page is the Dashboard page.
On this screen, you can view ‘View My Donations’ that you have posted and your accepted donations waiting to be transferred.
Foodiverse will prompt you if you are scheduled to post a Donation today, see the ‘My Scheduled Donations’ card.
Click the Yes or the No button to begin the process of posting a donation. Your Branch will be preselected on the Donate page.
Alternatively - Click on ‘+’ Donate icon on the navigation bar to create a donation.
Creating a Donation
-
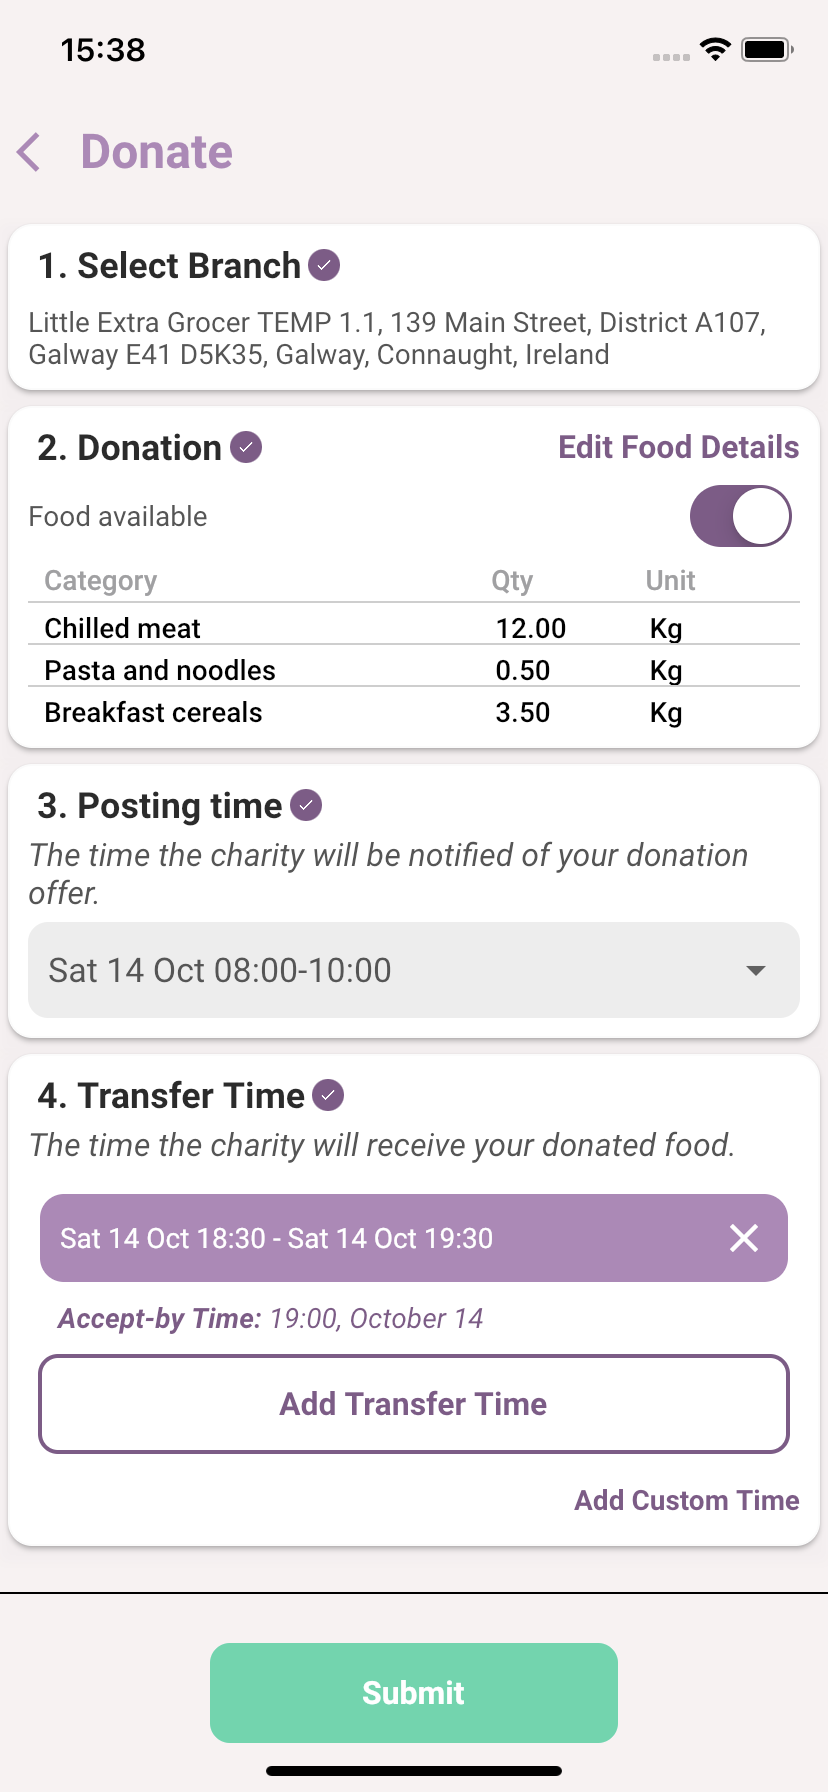
Select Branch
-
This will be auto-selected if you have 1 branch
-
-
Donation
-
Food Available is the default setting when Yes is pressed. If you have food available to donate today click the Add Food Details button to proceed (see further instructions below).
-
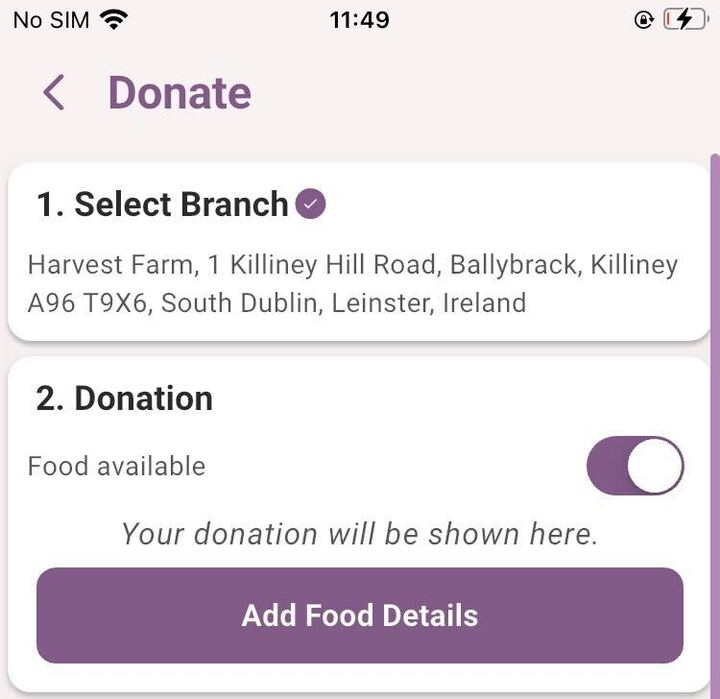
No food available is the default setting when No is pressed to start the donation process.
Submit the offer to let your scheduled charity know that there is food or there is no food available today.
-
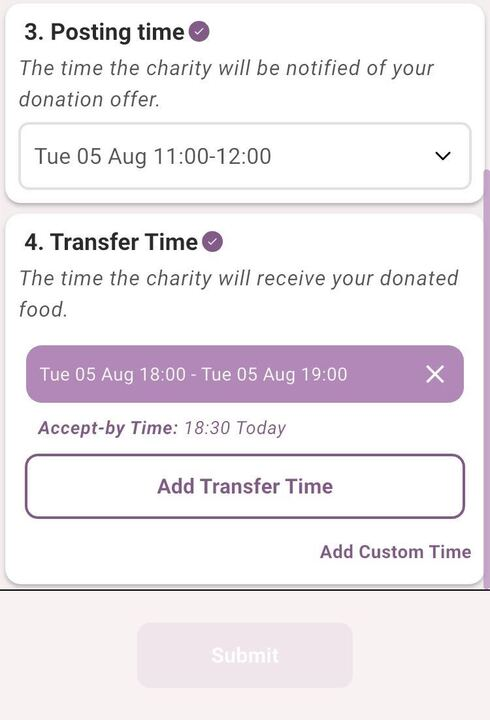
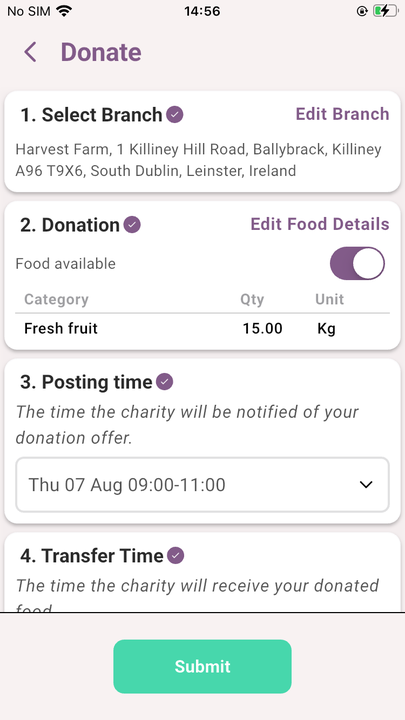
Posting Time
-
The is the time the primary charity will be notified that the donation has been posted.
-
-
Transfer Time
-
The is the time that the charity will know to collect the donation from you.
-
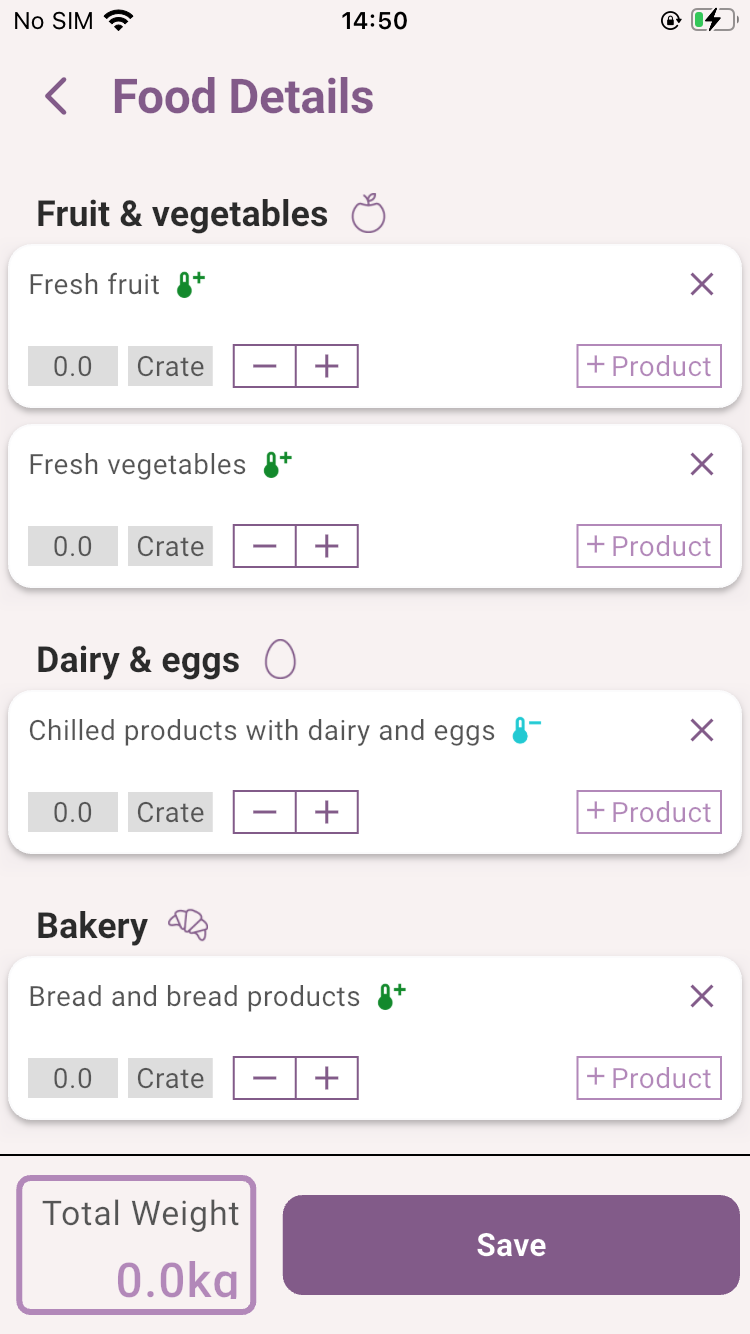
Add Food Details
Depending on how your organisation has configured the settings regarding Food Categories and Product Level Detail, it will determine how the Add Food Details screen is displayed.
See Food Category and Product Settings here for more details.
There are 2 ways to add Food Details:
-
Using Food Categories & Subcategories with quantities
-
Using the add +Product Level Detail
Your donor administrator may have added a list of approved products that can be selected during the donation process below. (Manage Organisation>Organisation Settings>Add/Delete Approved Product Records)
Certain users can also add new products during the donation process below.
Adding Categories of Food to a Donation
Use the Plus and Minus buttons to increase or decrease the weight of the food category for the donation.
There are only 0.5 KG increments allowed.

Or you can click the grey 0.0 Kg value and type the weight of food.
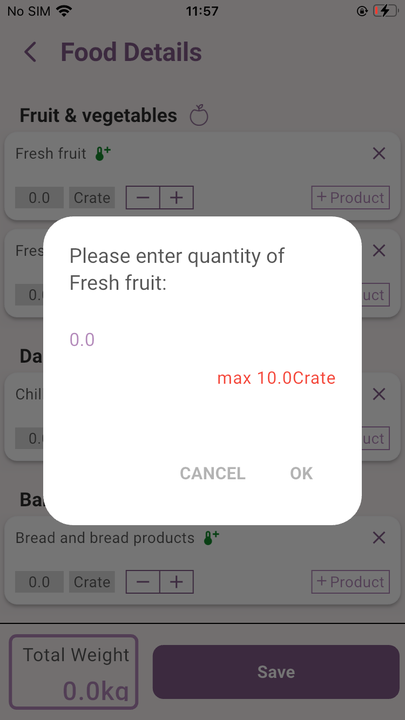
Continue until you have entered the values for all relevant Food Categories in this donation.
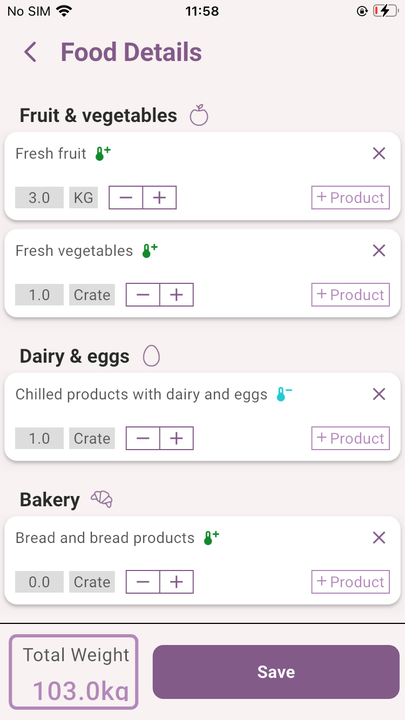
When you have entered the values for the relevant Food Categories for this donation click the Save button.
If you want to hide some Food Categories from the list click the X button and click Yes to confirm.
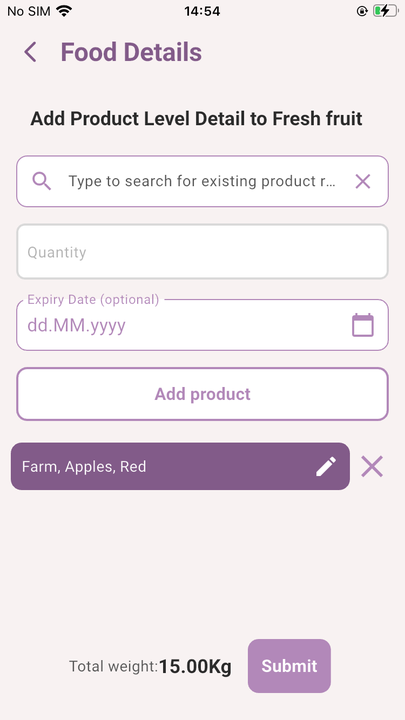
Adding Product Level Detail to a Donation.
Click the +Product button next to the appropriate Food Category.
Note: this action may not be available due to your organisation settings
Use the type to Search box to find the product you want to add to the donation. Select the product from the list. Scroll down the list or continue typing to find the correct item.
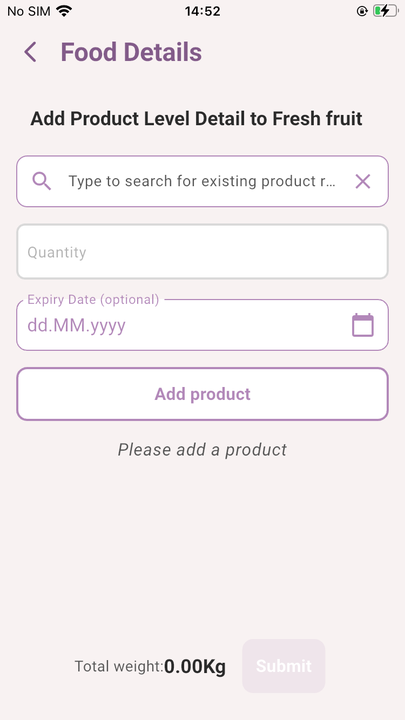
Then add the quantity and the Use By/Best Before Date and click the Add Product button to complete this entry.
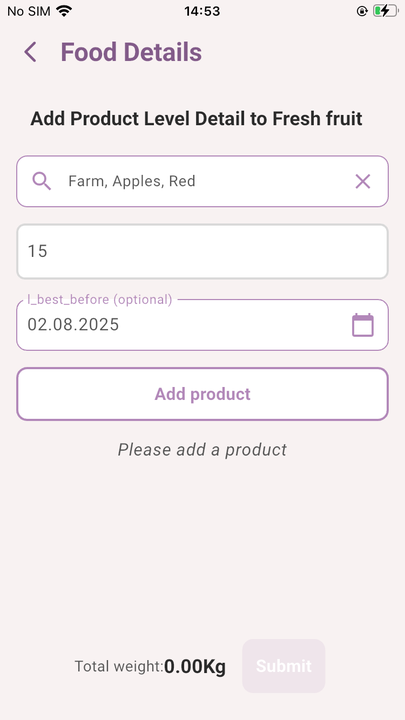
Continue to add products to this Food Category. The products entered will be listed and the Total weight field will be updated as you progress. Once you have finished entering all products for the Food Category click the Submit button.
The Foodiverse app will return to the list of Food Categories where the product you just added is confirmed and you can add products to other food categories if you wish. When you have finished adding products click Save.

When you click Save you will be returned to the Create Donation screen where the quantities of food entered will be summarised.
Click ‘Submit’ to post the donation.
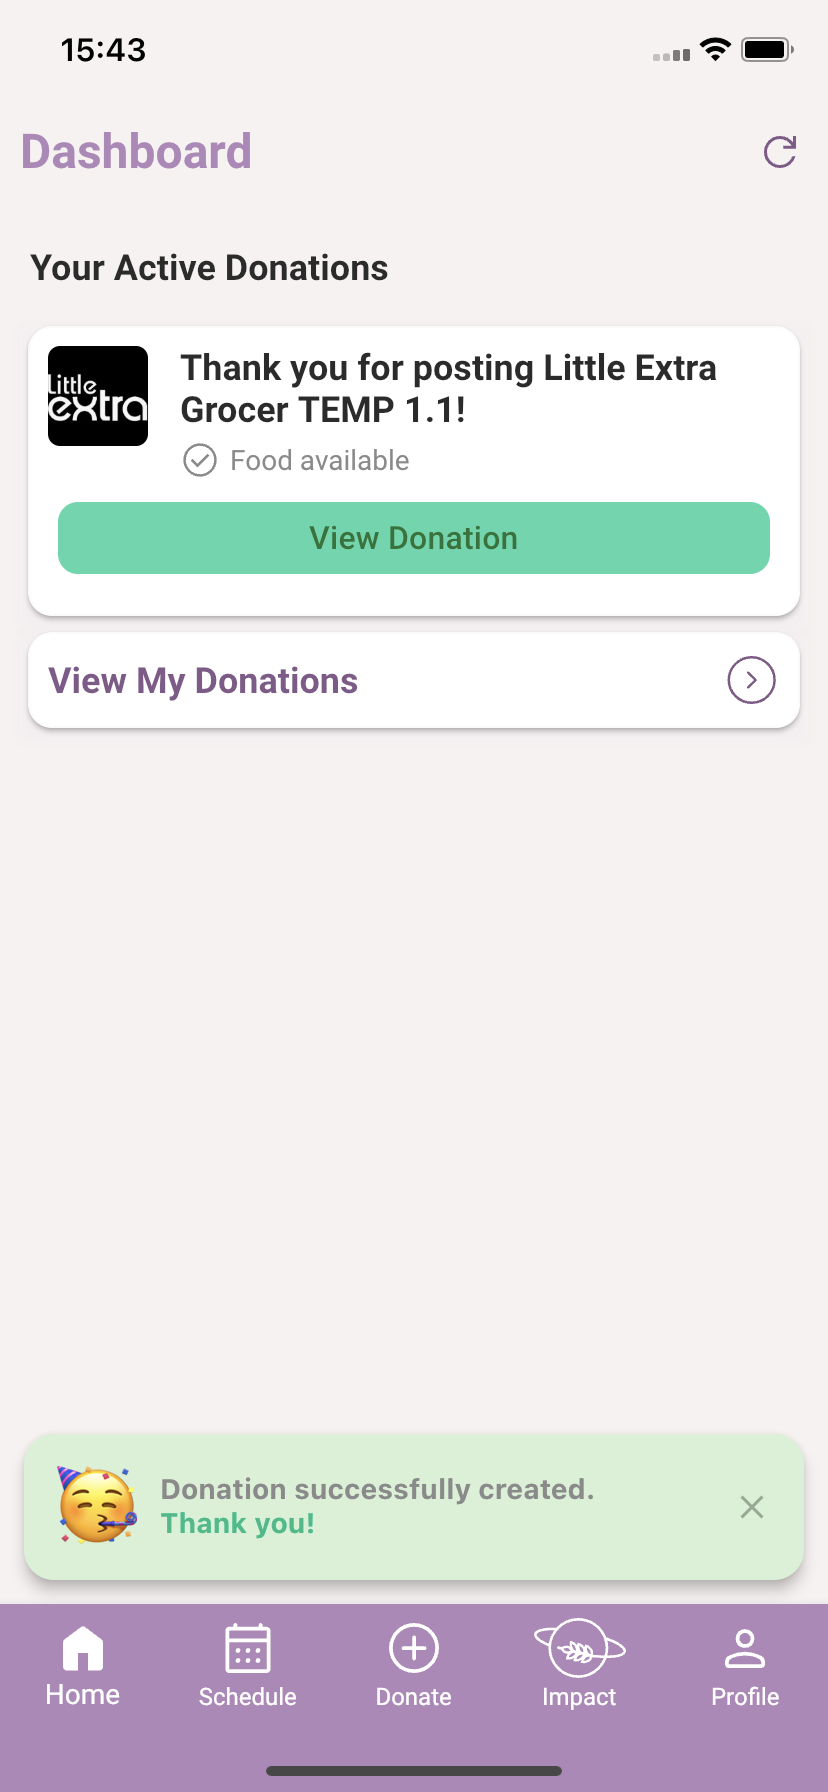
You will be returned to your dashboard. The ‘Your Active Donations’ card has a new message thanking you for posting.
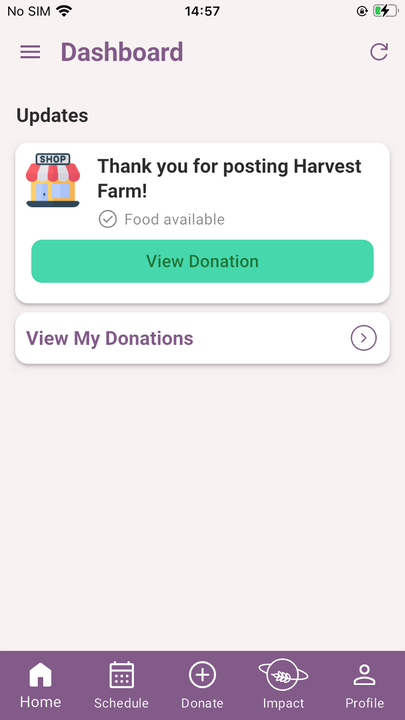
You can see the details of the donation (see below image) you have posted by clicking the arrow in the ‘Your Active Donations’ card (see above image).
Adding New Products
If you need to add a New Product (one that is not listed when you Search for a product) you can Add that product to the database.
It will be stored at Organisation level and will be available for any donor branch/ donor user in that org to see & use.
When Adding Food Details, Click +Product and begin to type to search for products.
Posting Time
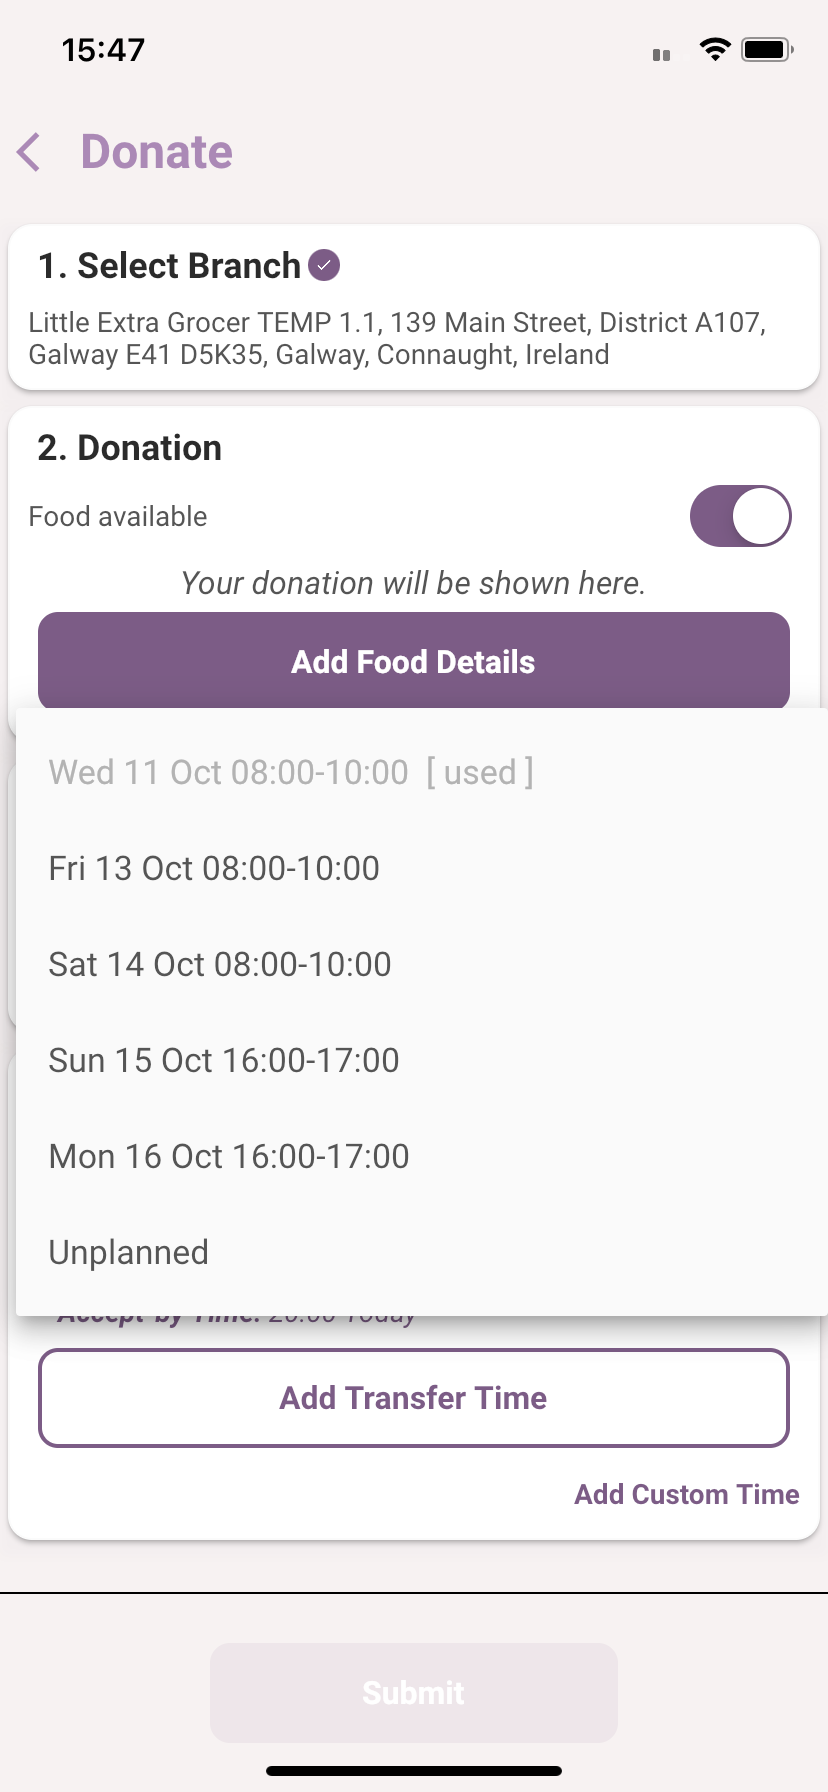
Foodiverse will check your Donor schedule and auto-select the next Offer Time for this donation, the time when the charity will be notified of this donation.
If the Offer time is suitable, go to the next step, otherwise, click the dropdown button to select another Offer Time. Foodiverse will present you with a list of Offer times based on your schedule or you can choose an UnPlanned donation.
Select an appropriate Posting Time for the scheduled donation or click UnPlanned to post an unscheduled offer.
This will be auto-selected for you if posting at the correct time.
Transfer Time
Select a Transfer Time, a date and time when you would like the charity to receive the donation (Collection or Delivery).
If the Transfer time is suitable, go to the next step, otherwise, click the Add Transfer Time button to select an alternative scheduled Transfer Time.
NOTE: The Accept-By Time will be displayed based on the Transfer Time chosen. The Accept-By Time is defaulted to 30 minutes before the end of the last Transfer Window but can be configured here.

Once all fields are completed on the Create Donation screen, you can Save the details and post the donation.

Foodiverse will then confirm that the donation has been successfully created.
Your Active Donations (Transferred)
The dashboard can take you to the list of donations that you have already posted and are active.
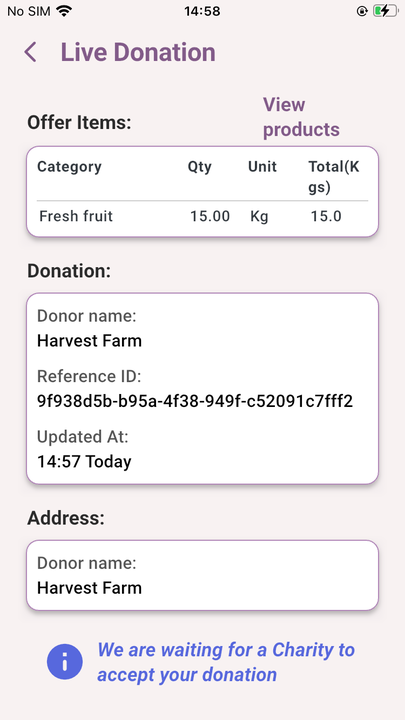
Once a charity accepts the donation, the dashboard will display:
-
the branch that offered the donation.
-
The charity that has accepted the donation is also displayed.
-
The food classifications that the charity has approval to receive are indicated by icons (Ambient, Chilled, Frozen & Hot icons).
-
-
If you have posted a donation today, a card indicating that it is being offered to charities is displayed. ‘Thank you for posting’.
A donor can mark a donation as Transferred (Collected/Delivered). Click the card to see a donation in detail and/or choose whether the donation has been Transferred or Not-Transferred by selecting the corresponding button.
If the donation has been collected/delivered and you click the Transferred button you will get a confirmation message, click Yes.
The donation is completed, receive a snackbar saying the ‘Donation transferred successfully. Nice job!’.
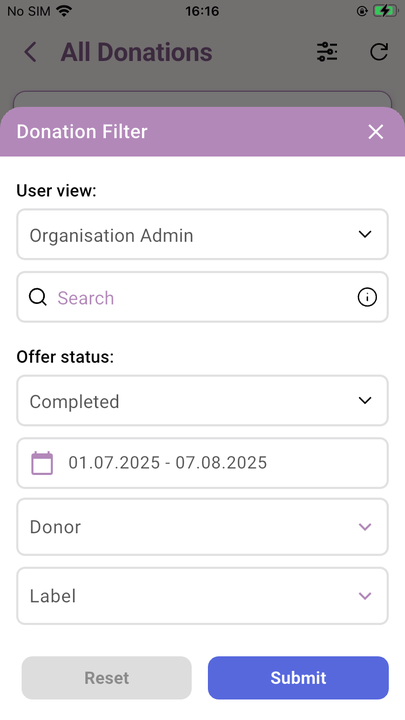
View My Donations
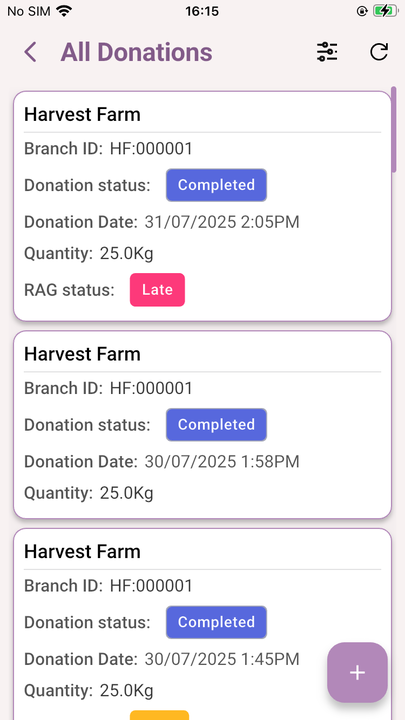
The All Donations screen will list previous donations that you have posted to Foodiverse.
Click the card ‘View My Donations’ to display your donations.
A list of your donations is displayed. Touch the card to see the donation in more detail.
You can not view more details for No Posting or No Donation entries.
The default date range is the previous week, 7 days from today.
To change the date range, click the dates at the top of the screen and then select a From and To date. You can select any date range up to the previous 90 days. Then click Save.
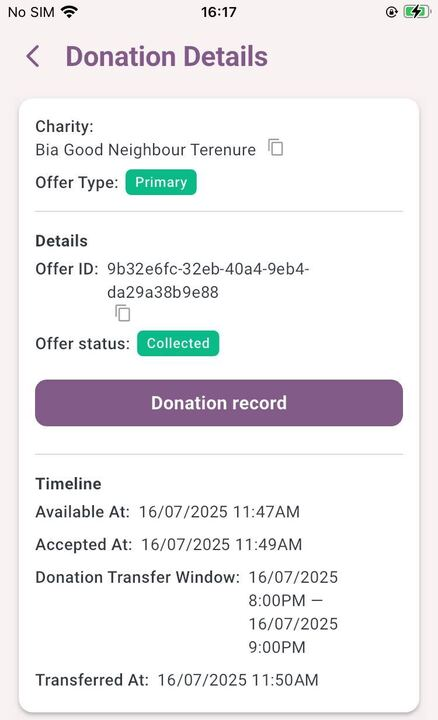
Touch the card to display the donation in more detail.
The Donation Details screen will display the current status of the donation and any charities associated with it.
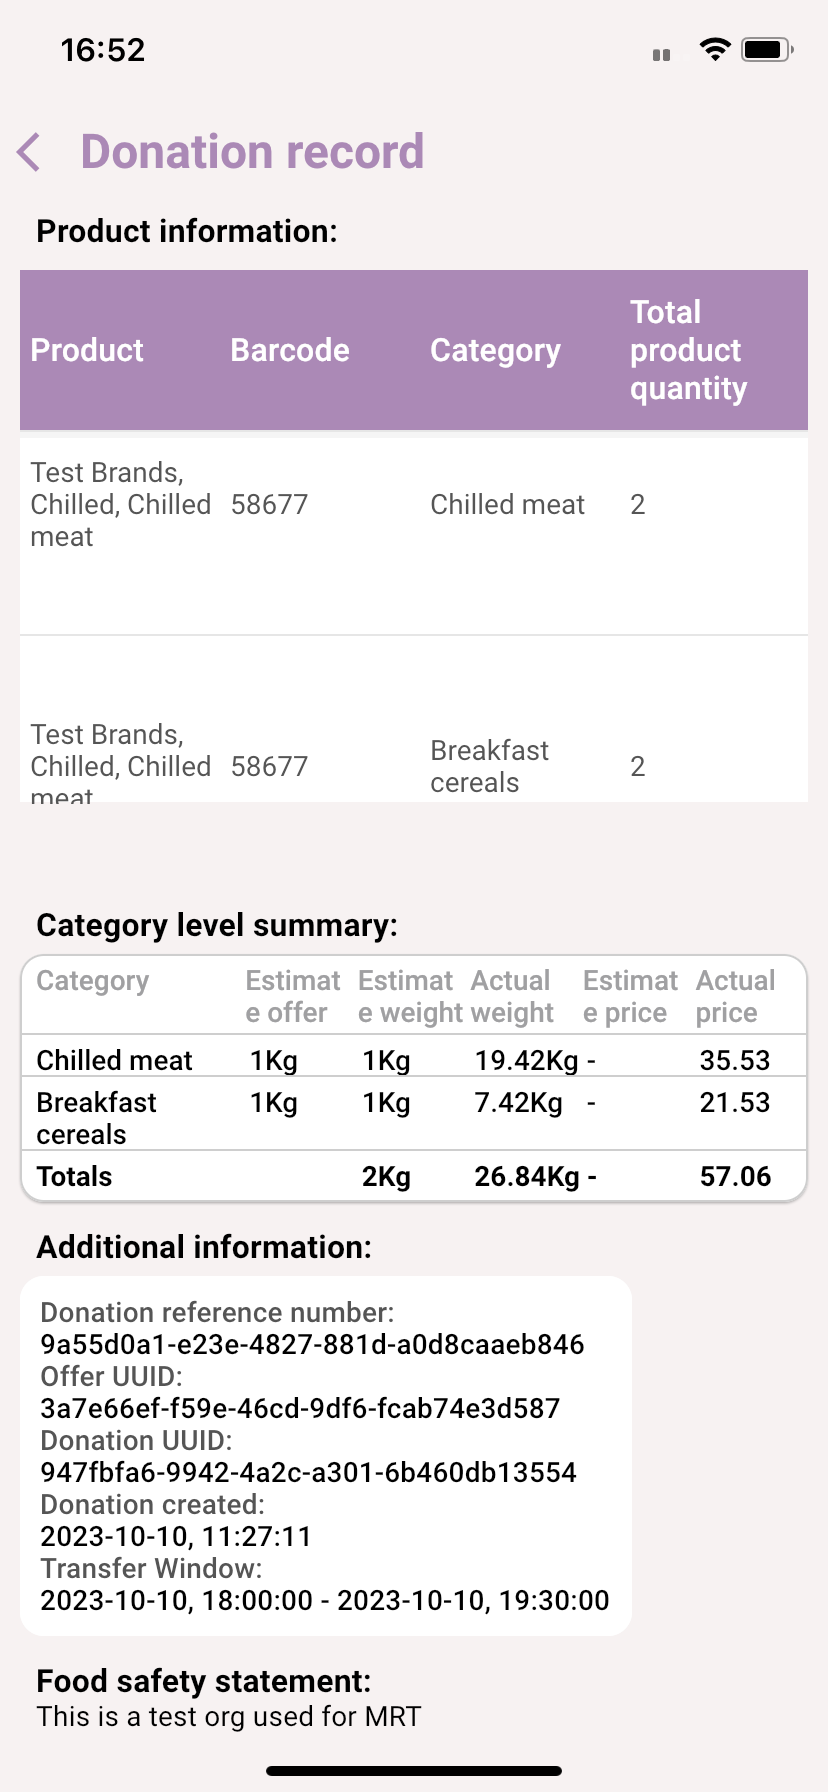
Donation Record
Click the Donation Record button to view more details of a donation including eSignatures (if available), a Category Level Summary and a Food Safety statement.
A donation record will only show when a donation is either marked transferred or not transferred. If a donation is rejected or accepted only, a donation record will not be generated.
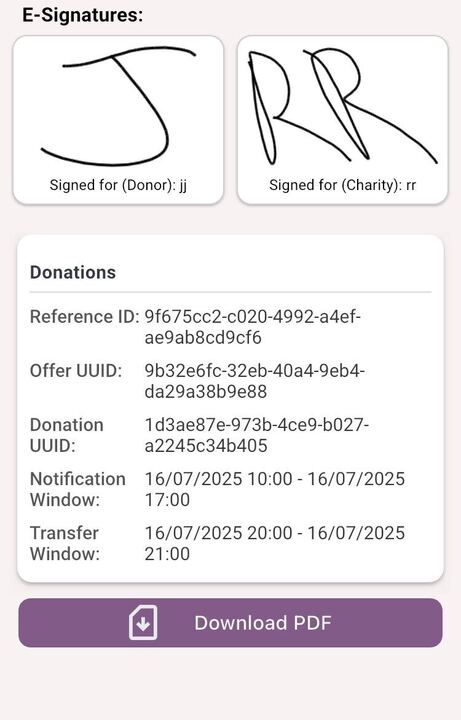
The Donation Record lists the Donor and Charity information including the Donation Status with Timestamp, the charity approved food categories and any eSignatures if eSign is configured for this donor.
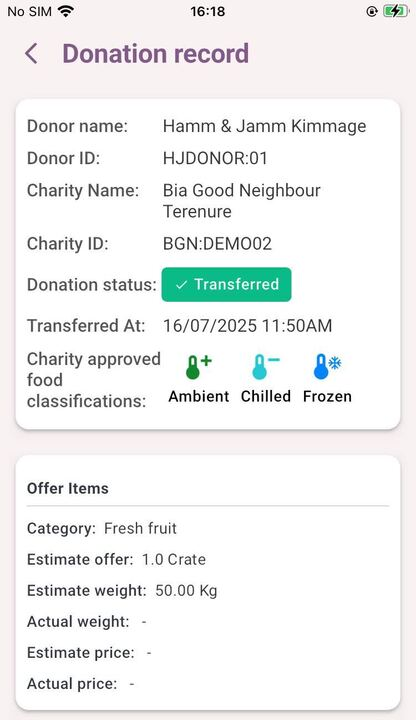
Scroll down to reveal the rest of the Donation Record which list the Category Level Summary, additional information and any Food Safety statement posted by the donor.
If the donor has provided a confirmed volume of the food products received by the charity then the Actual weight and price will be displayed in the Category level summary.
If the donor has provided Product Level Detail a Product Information screen will also be displayed. Scroll to the right to reveal more columns of product information.
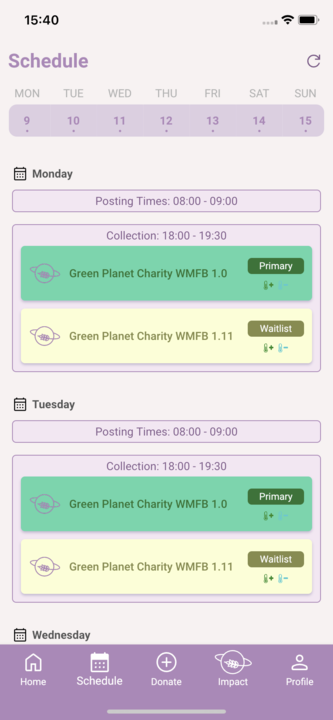
View Your Schedule
Click the ‘Schedule’ icon at the bottom of the app (the second from the left) and then select your branch from the branch dropdown to view the branch schedule. Primary (green) and Waitlist (yellow) charities are listed for each day. The food classifications that each charity are approved for are listed under each charity type.
Select Branch will not be an option if the user does not have more than 1 branch.
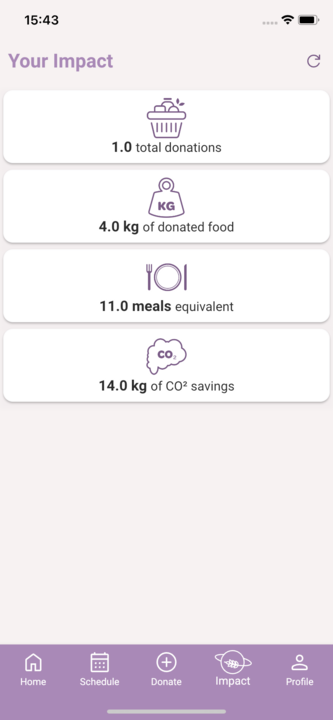
View Your Impact
Click the Impact icon at the bottom right of your screen, the user’s branch will be preselected to view the branch Impact to date.
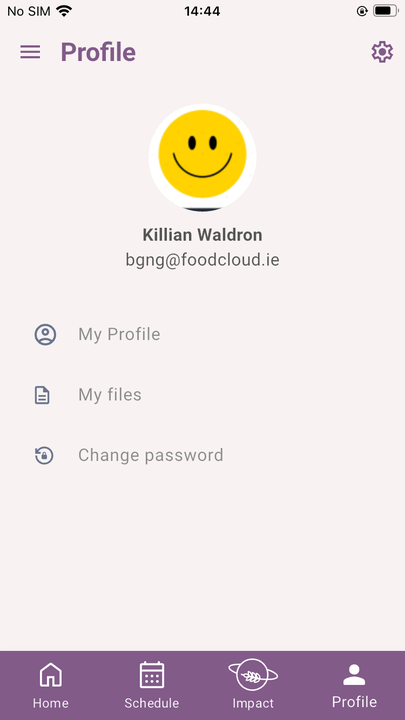
View Your Profile
Click the Profile button at the bottom right of the screen to view your Profile.
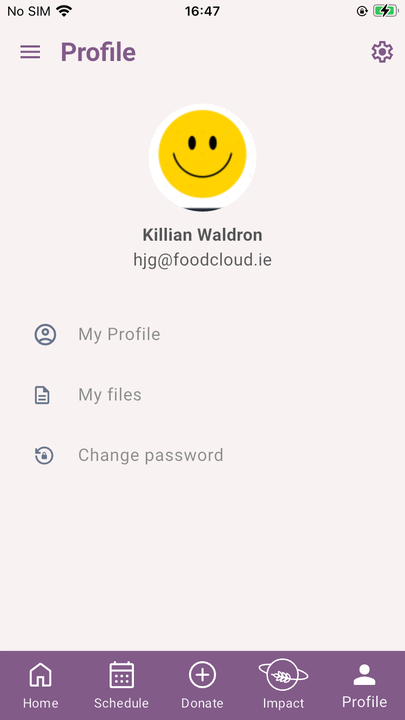
Then click ‘My Profile’, the page below will be displayed.
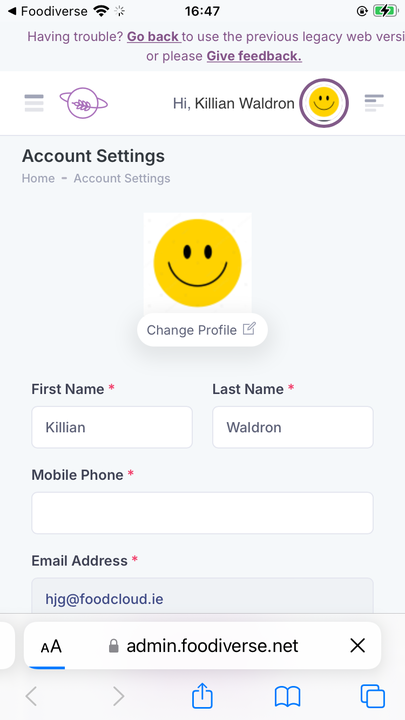
From here your profile details can be edited.
Email address cannot be edited.
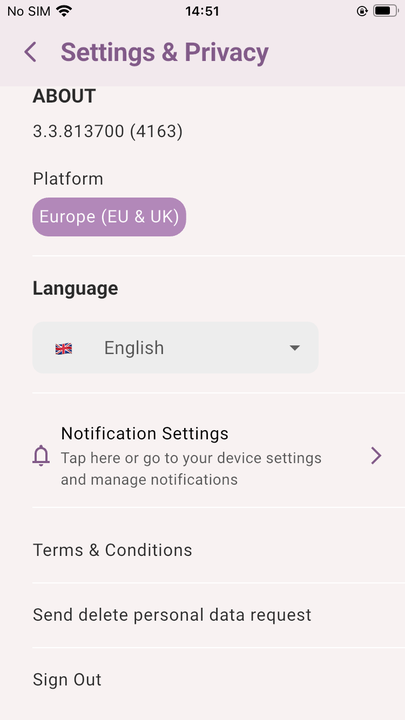
View Settings (Sign Out of Foodiverse)
Click the Gear icon (top right) to check the App Version, change Language or to Sign Out of Foodiverse.
On this screen, you can also request to remove all your personal data from Foodiverse - click Send delete personal data request.
Related articles
Still haven’t found your answer? Try:
Create a multi-collector donation