
Useful information for food banks, charity branches, and charity organisations.
-
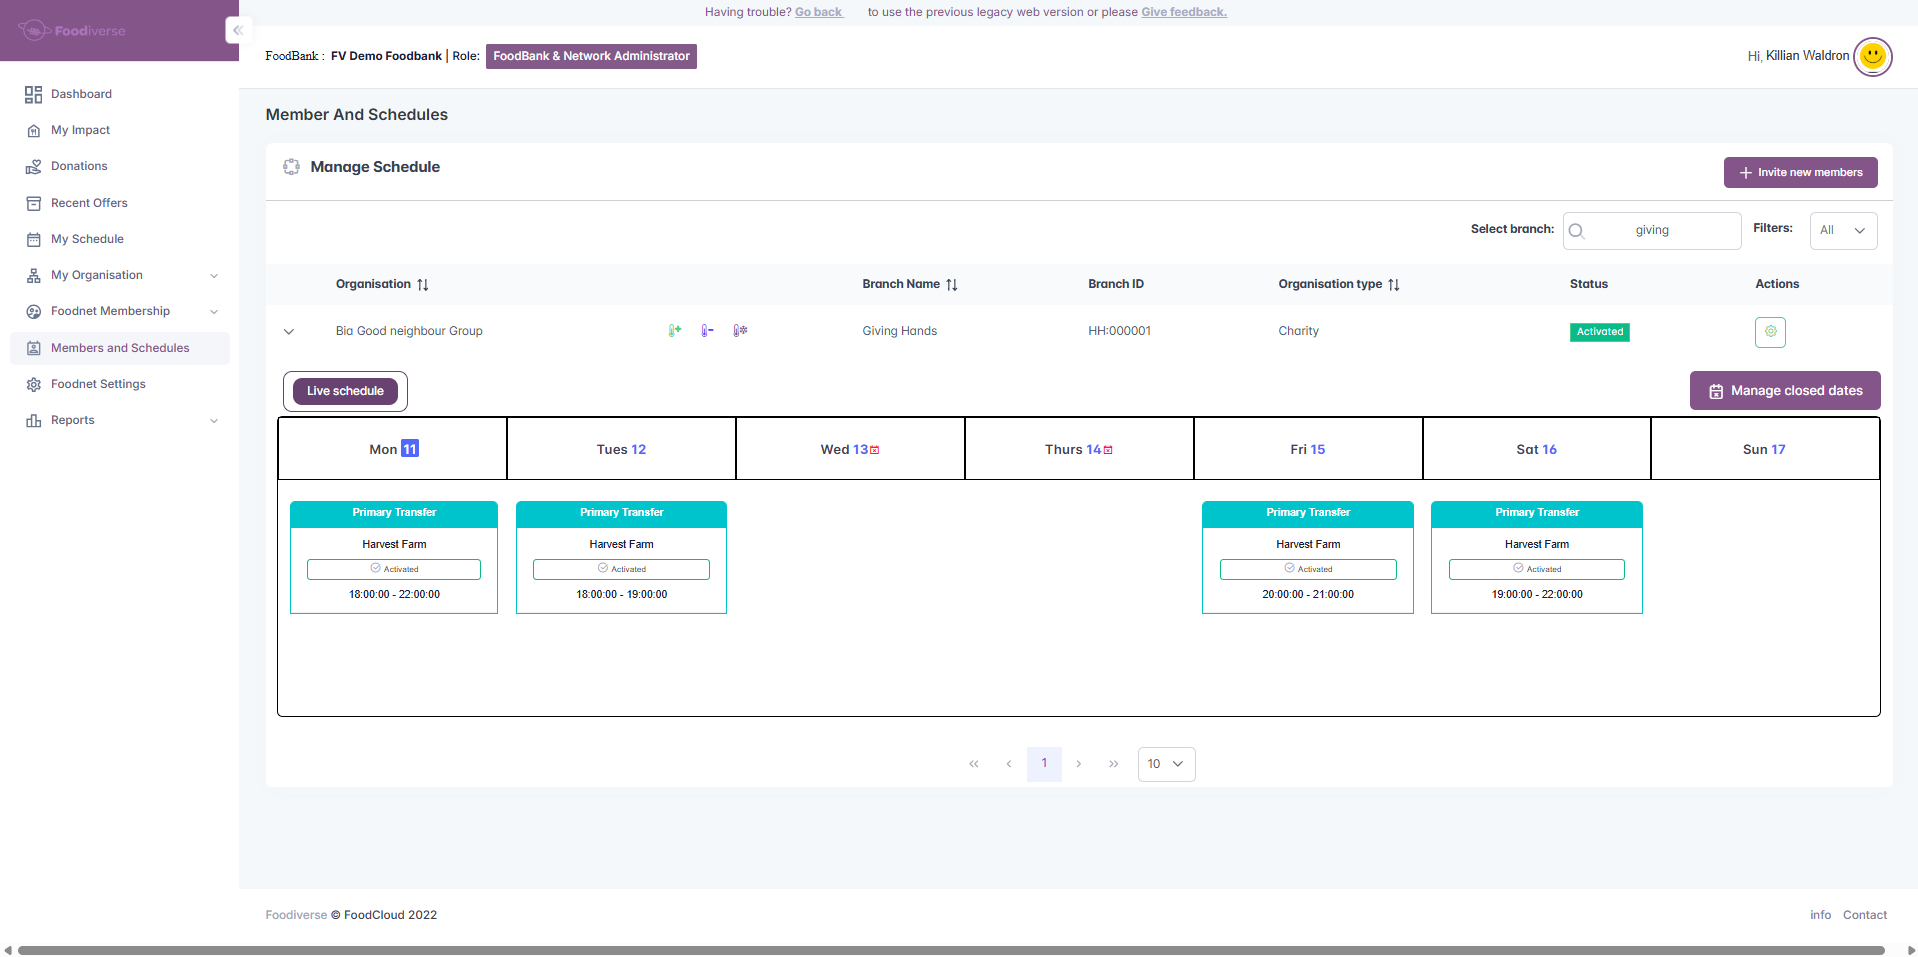
Accessing the Manage Closed Dates window
-
Navigate to My Foodbank Network > Manage Network Members > Search for specific branch > Blue dropdown arrow
-
In the top right corner, see Manage closed dates
-
Click the Manage closed dates button
-
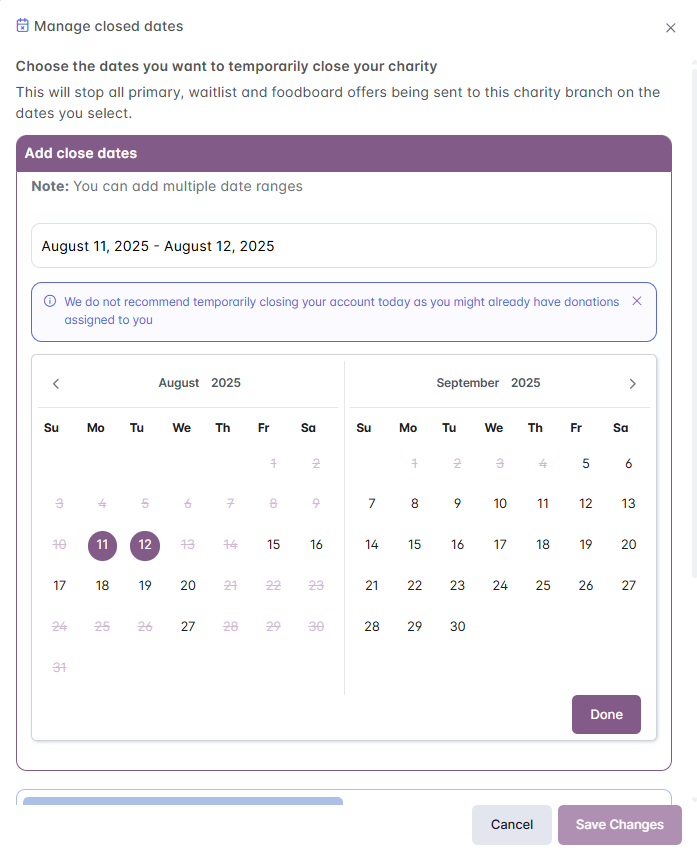
A maximum of 12 weeks in total can be added
-
Adding a New Close Date
-
Click on the white empty bar under "Add close dates."
-
Choose the dates you wish to close by clicking on them in the calendar. You can select multiple dates at once.
-
Selecting dates from the calendar will populate the form field with the chosen date range.
-
Click the "Save changes" button once you have selected your dates.
-
After adding dates, ensure you tap the "Save" button to apply your modifications.
-
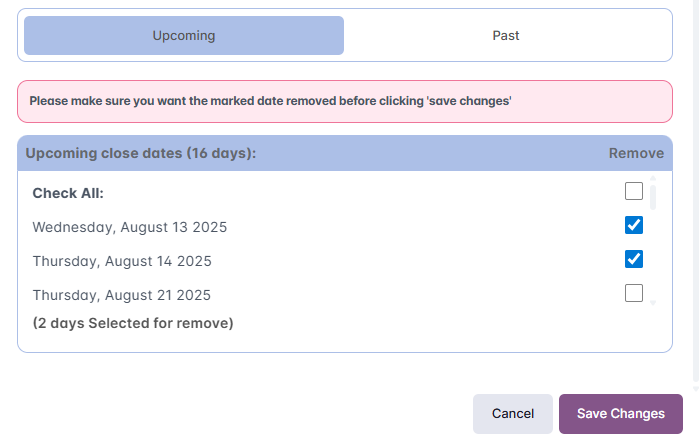
Viewing and Removing Upcoming Close Dates
-
In the "Upcoming close dates (5 days):" section, you will see a list of all the dates you have previously scheduled for closure.
-
To remove a date, check the box next to the date you wish to remove.
-
A warning message will appear asking for confirmation to ensure you want to remove the selected dates.
-
Press ‘Save Changes’, then press ‘Remove’ to confirm the removal of closed dates
-
-
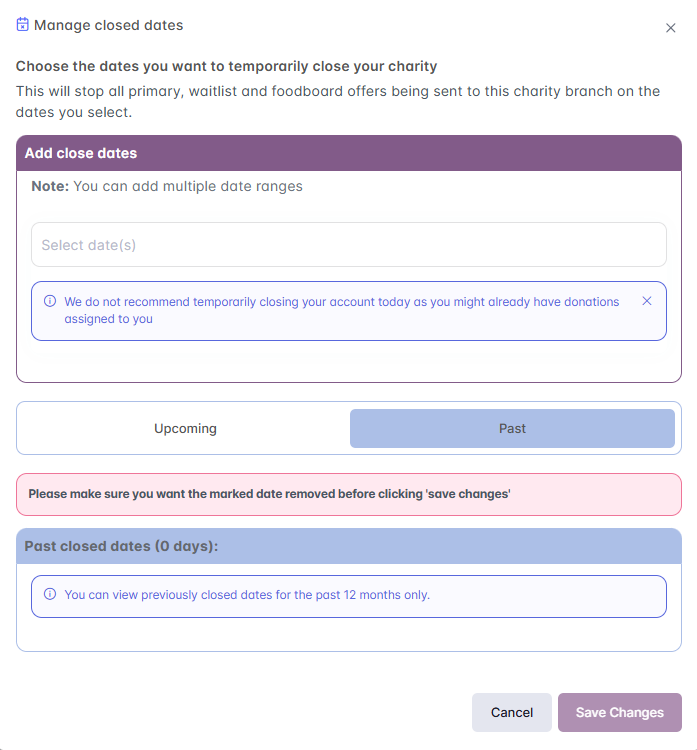
Past Close Dates Visibility:
-
The "Past" section allows users to view previously closed dates, with a note indicating the time range of available historical data for the past 12 months.
-
This feature provides users with context on when previous closures occurred.
-
Increased Visibility of Temporary Closures
-
Red Calendar Icons and Text
-
Indication of Temporary Closures -
-
Red calendar icons with a red 'X' mark the days when the charity will be temporarily closed.
-
Additional red text states "You are marked as temporarily closed," providing a clear visual cue.
-
-
