
Useful information for Foodbanks users/admins interacting with schedules.
Scenarios where the auto-rotation will not happen
-
The donor branch posts a ‘No availability’
-
The donor branch has a ‘No posting’
-
The donation is not marked ‘Transferred’
How to set-up schedule auto-rotation
-
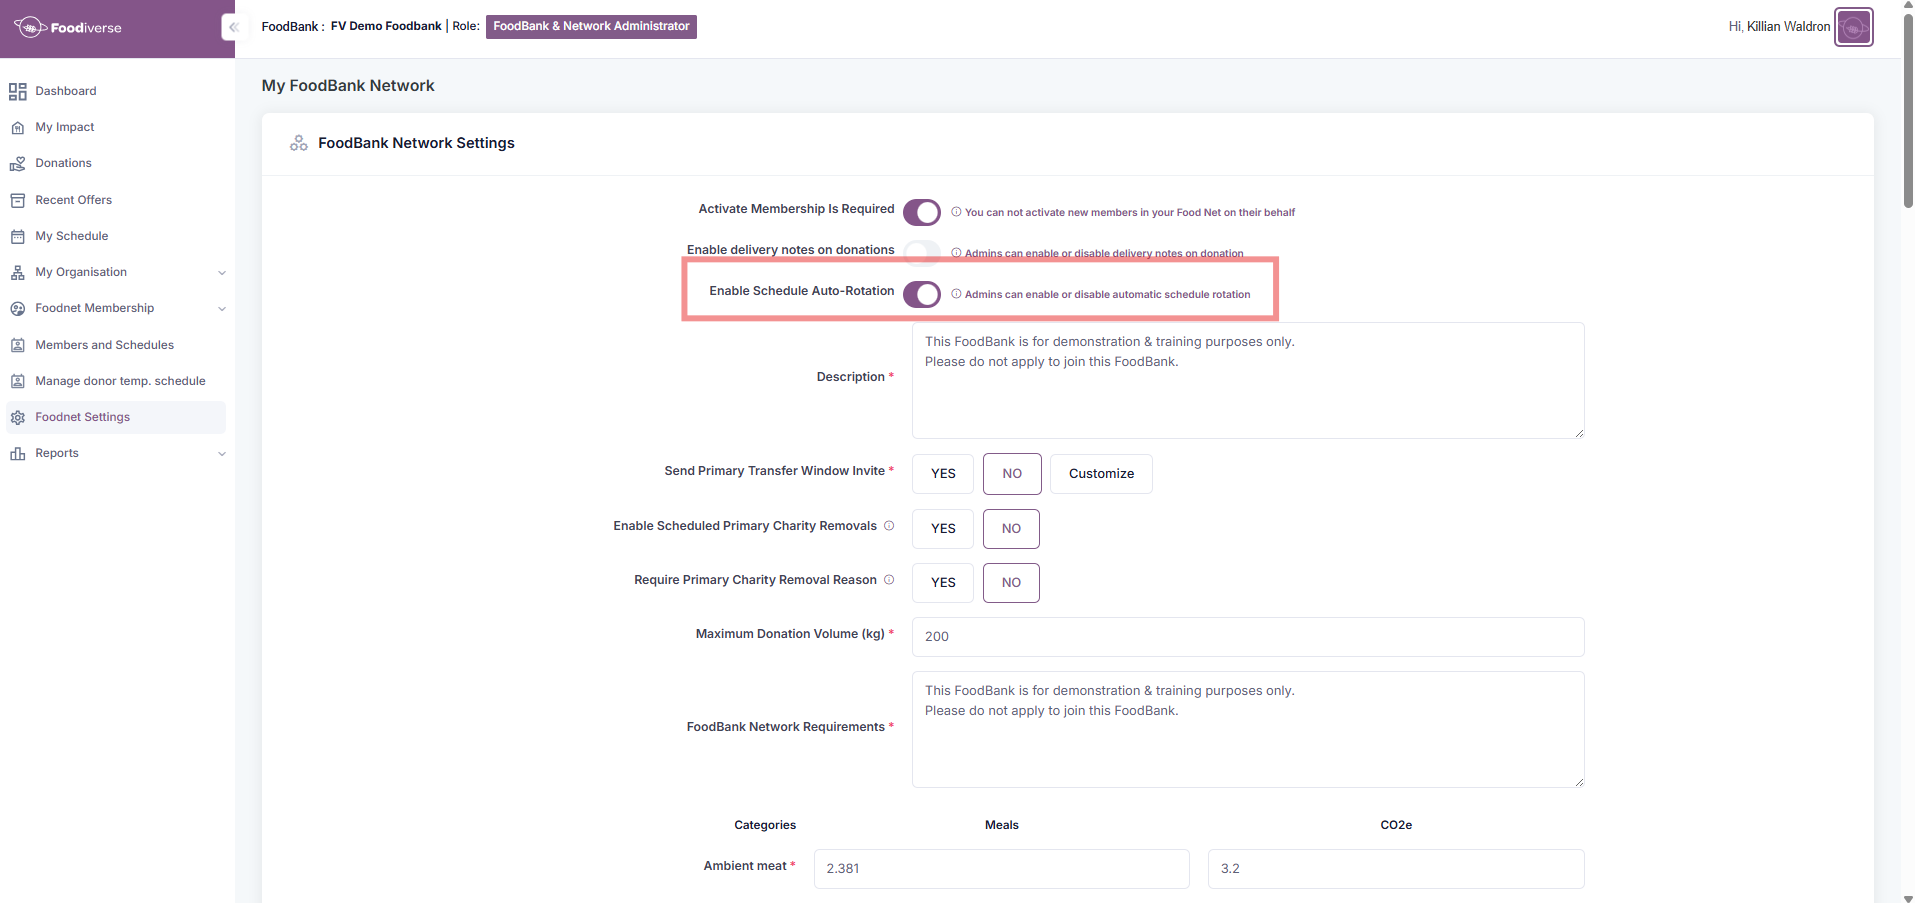
Navigate to the ‘Foodnet Settings’
-
Ensure the toggle for ‘Enable Schedule Auto-Rotation’ is set to on
If the ‘Send Primary Transfer Window Invite’ option is set to ‘Yes’, then the new primary charity must accept the invitation to the primary slot.
-
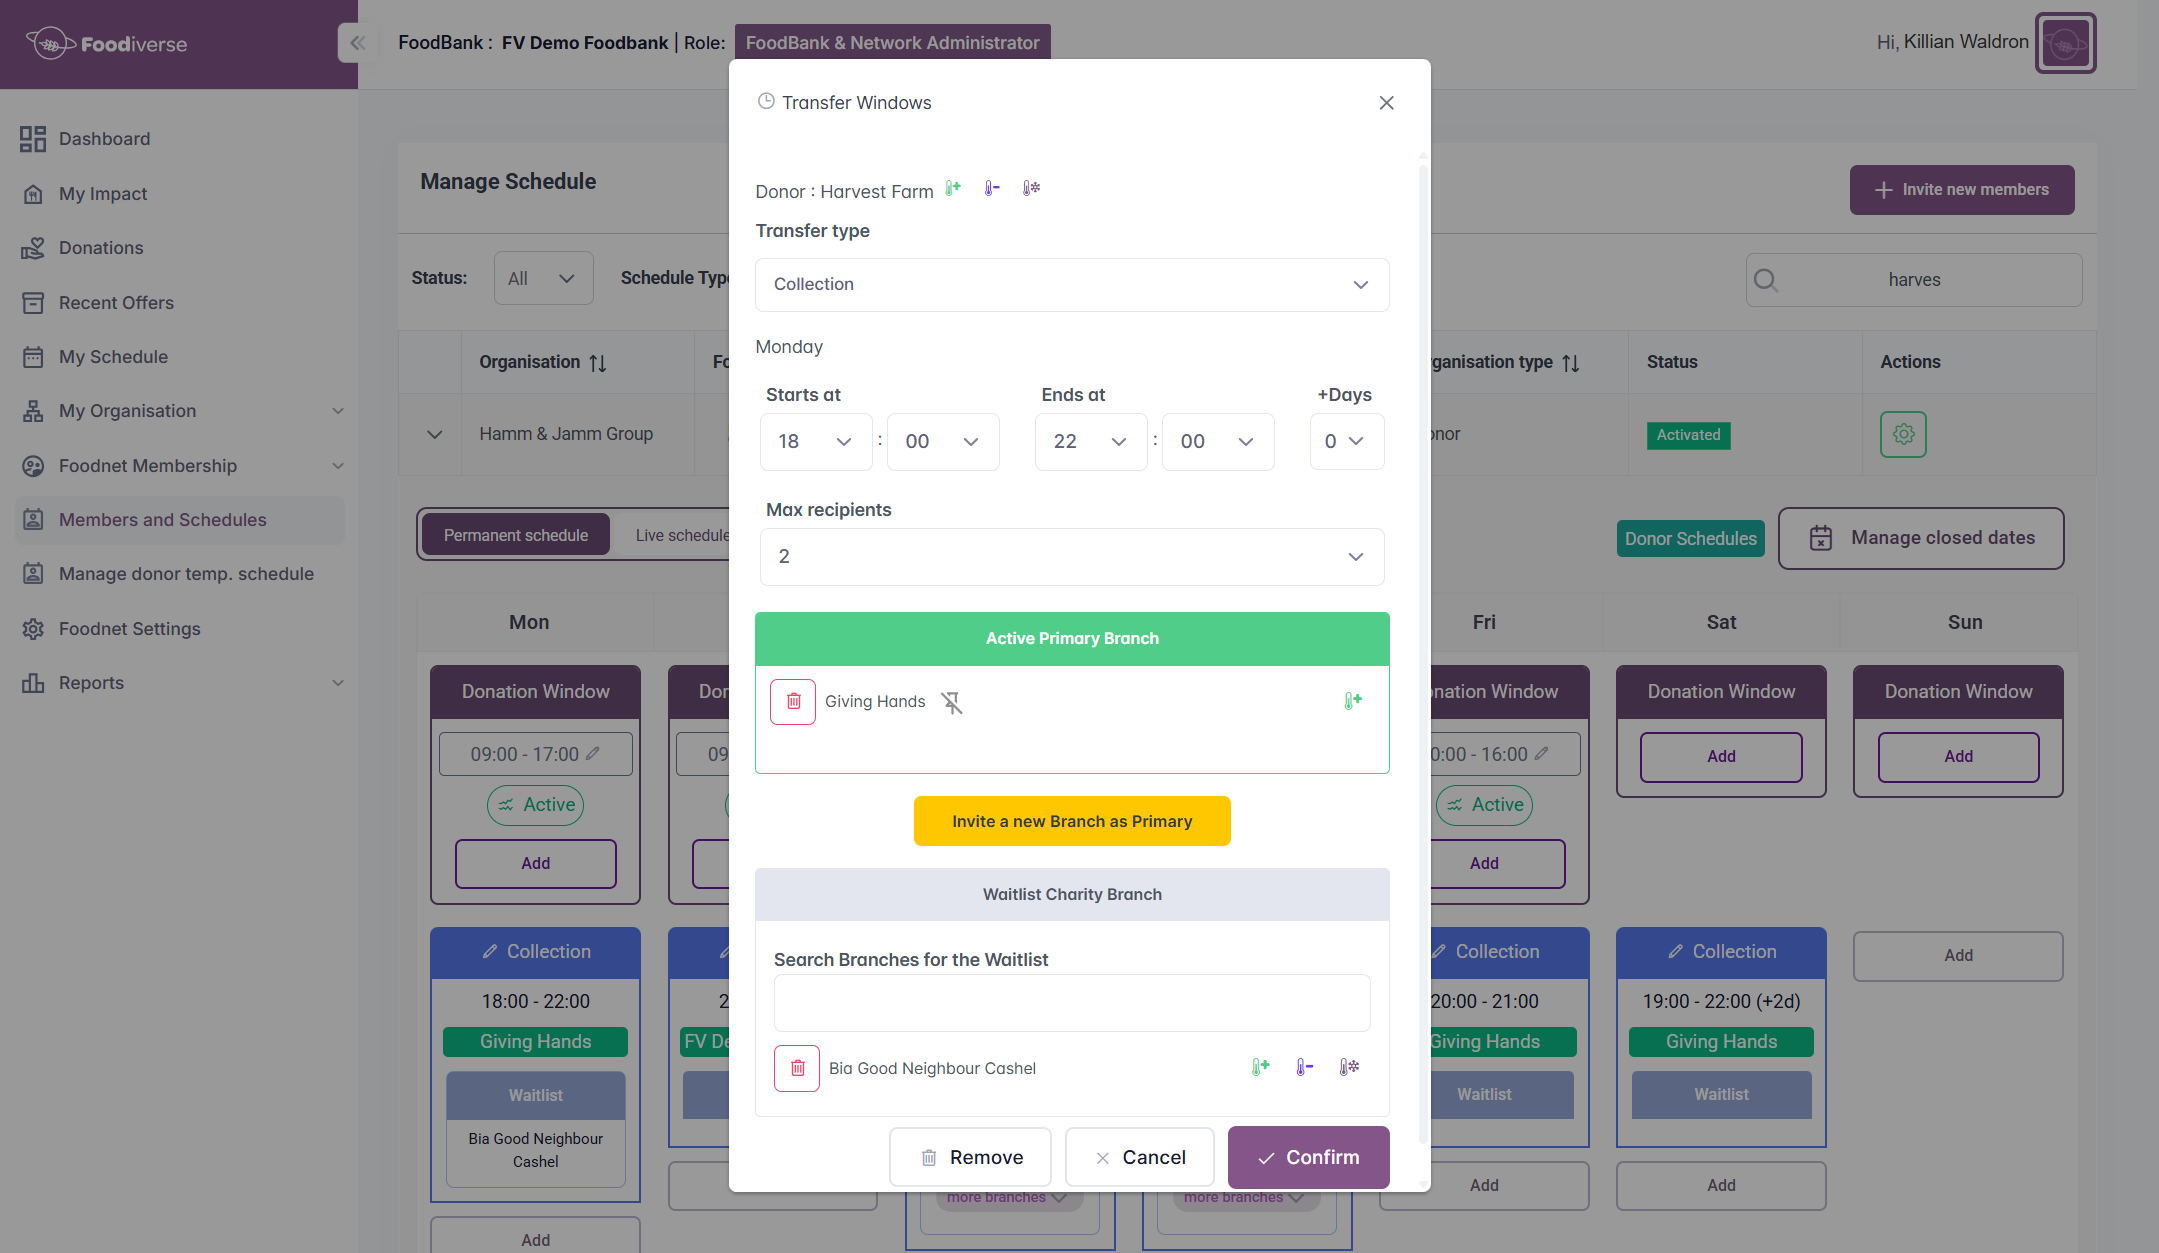
Navigate to the ‘Members and Schedules’ page and find -
-
The correct donor branch
-
Their correct schedule to be auto-rotated
-
-
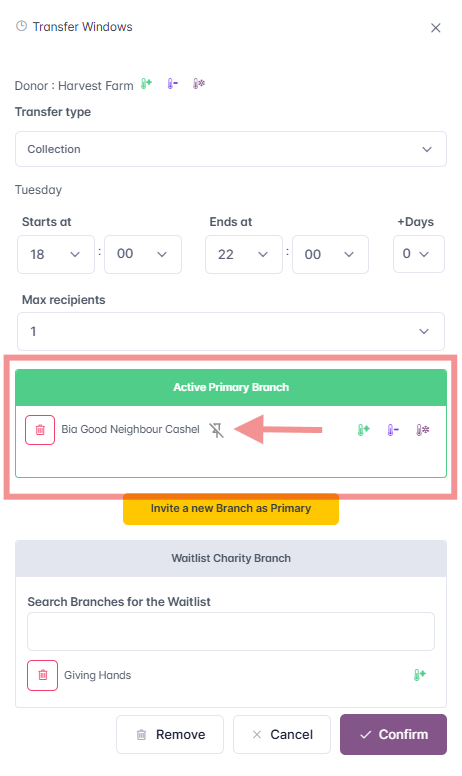
On the collection window, ensure the pin icon is greyed out
-
Meaning that the primary charity is not ‘pinned’ and the auto-rotation can happen
-
The pin will be green by default meaning the auto-rotation will not happen
-
-
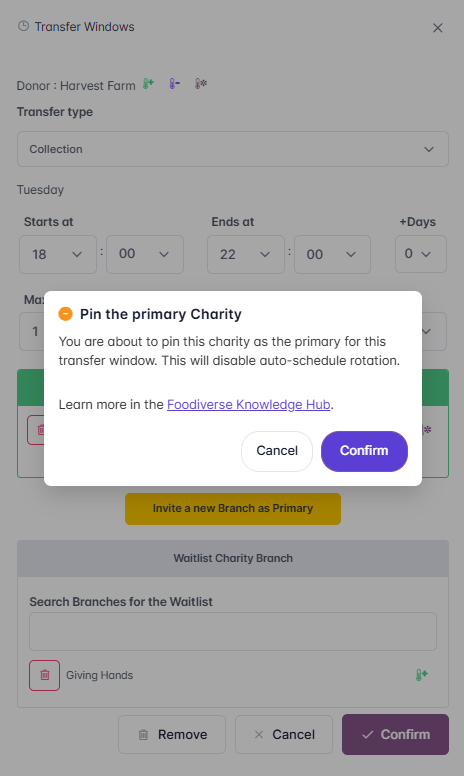
Once the pin is clicked, a pop-up will appear to
-
Confirm your choice
-
Provide information on whether you’re ‘pinning’ or ‘unpinning’ the primary charity
-
Provide a link to this article explaining the feature in it’s totality
-
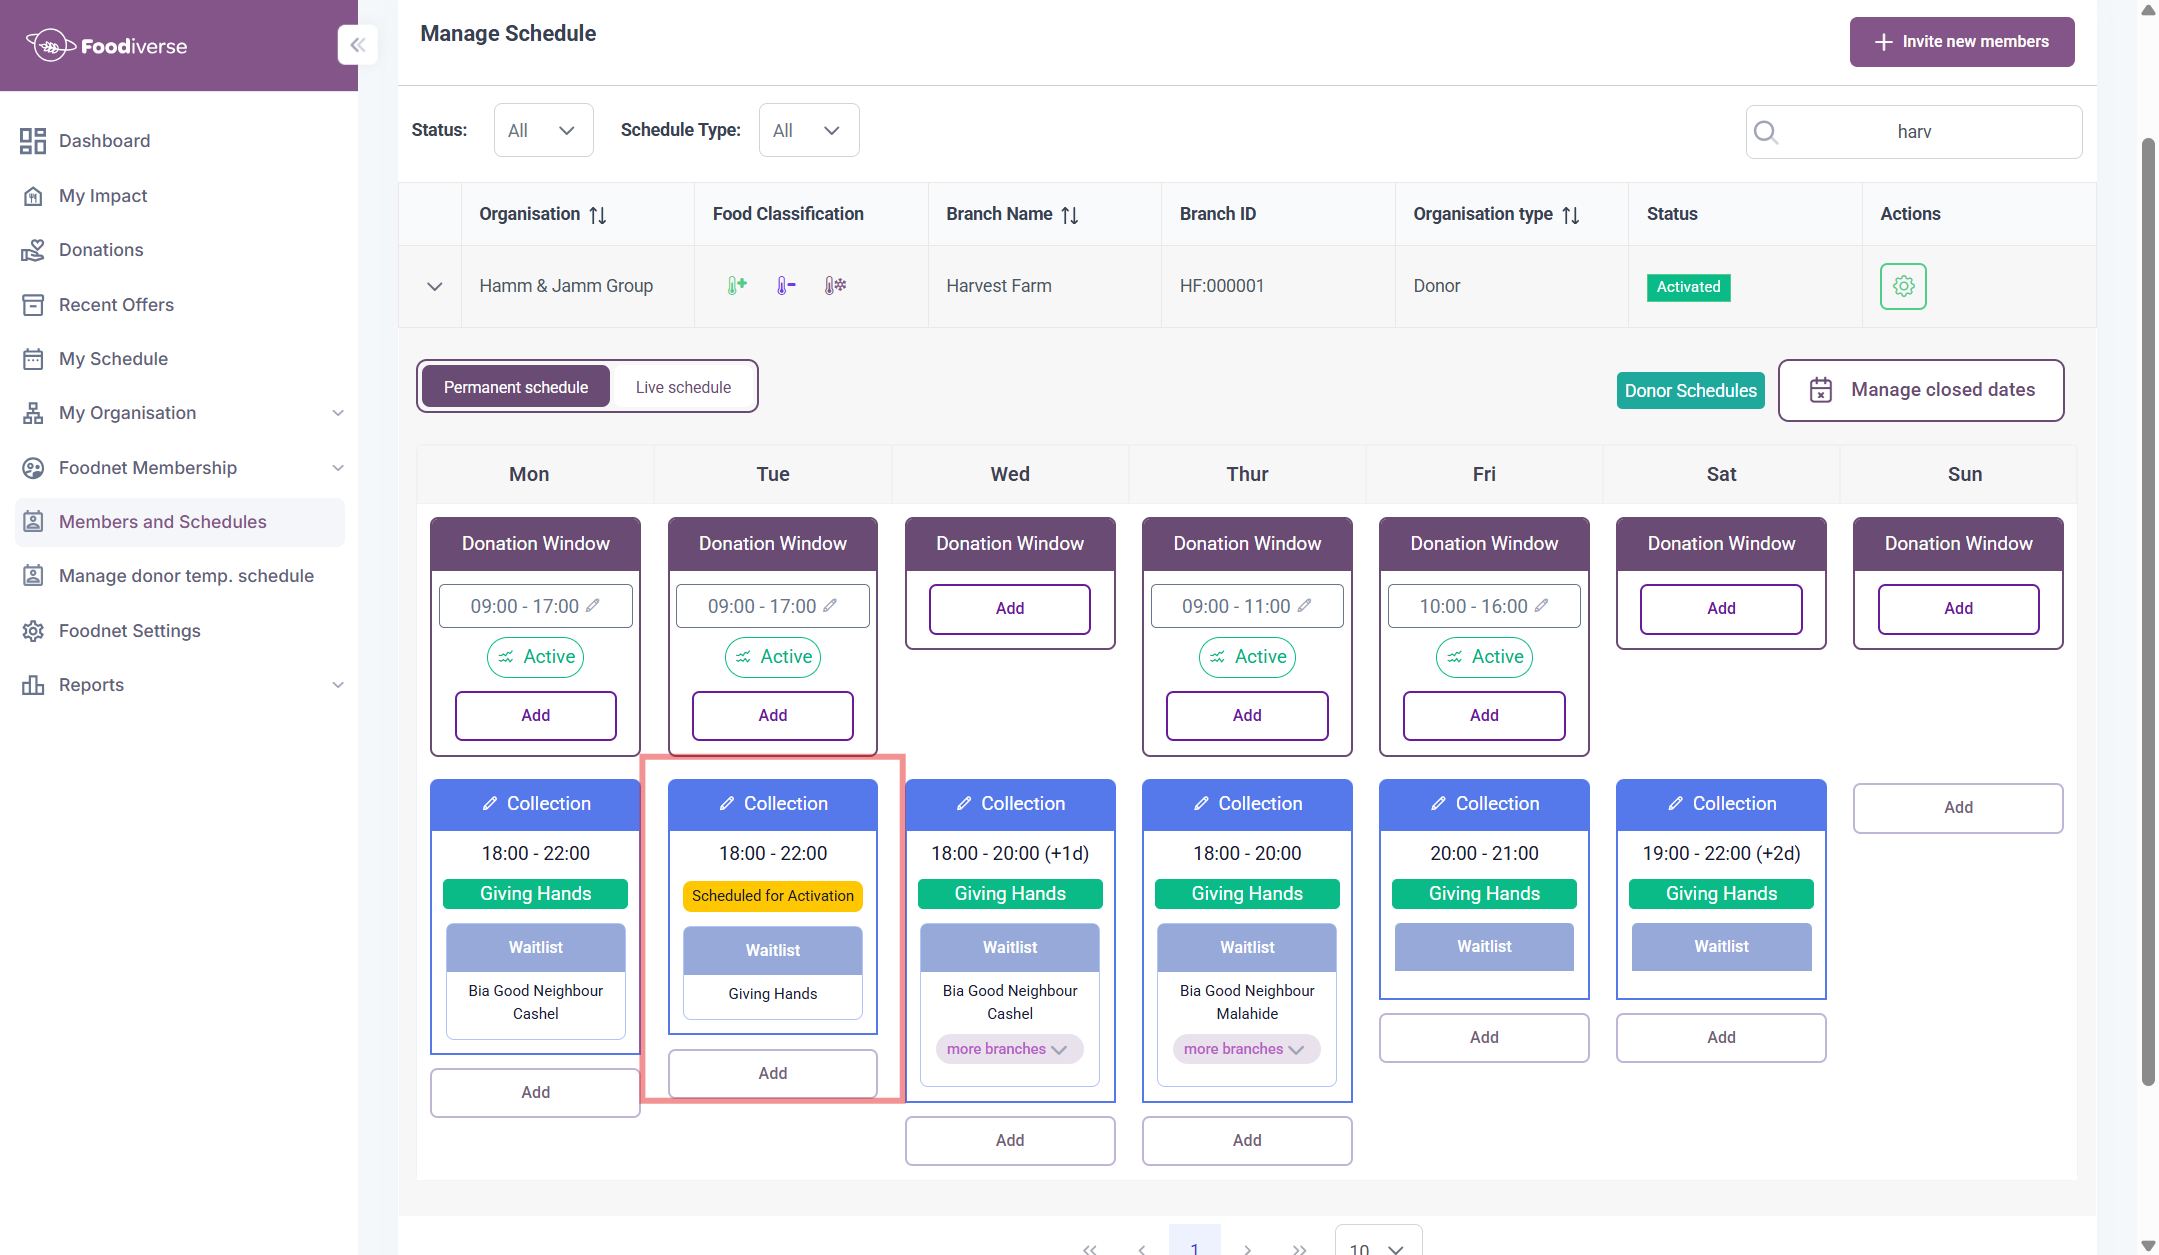
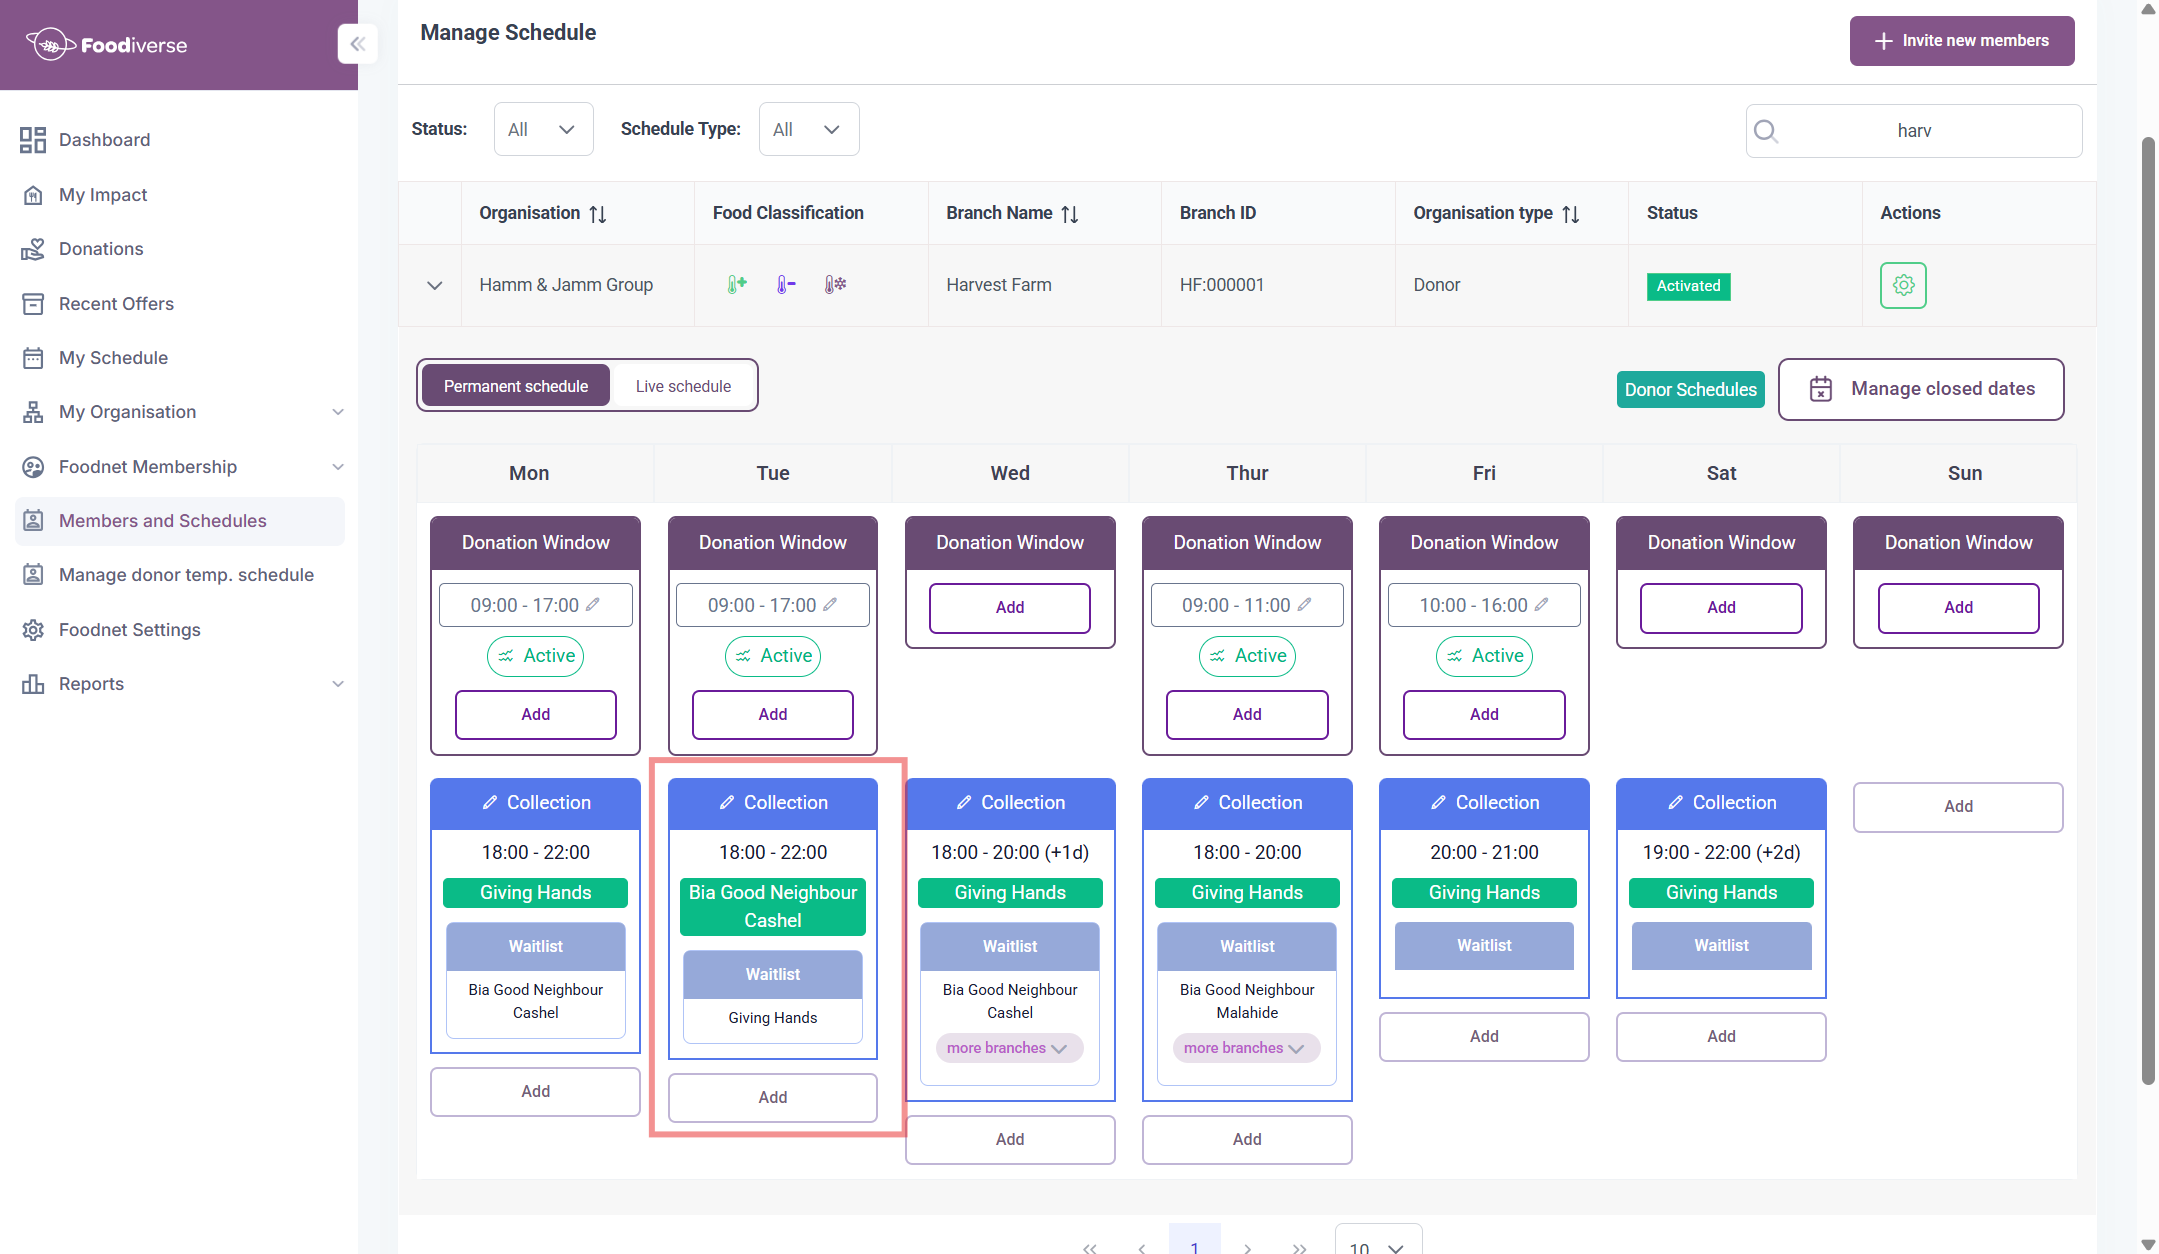
What the schedule auto-rotation looks like
Once the donation has been marked ‘Transferred’, the following points will happen in order
Scenario -
-
The donation was posted by the donor
-
The donation was accepted by the primary charity
-
The donation was transferred by the donor
-
Once the donation is marked transferred, the auto-rotation will begin
-
The first automatic step will be the first waitlist charity will be promoted to the primary position
-
While the primary charity is added to the last position on the waitlist
-
-
-
The next step is after the new primary charity has been invited, depending on the Foodnet setting for 'Send Primary Transfer Window Invite'
-
The new charity must accept the invite to the primary slot
-
The new charity will have the invite automatically accepted by FV
-
The auto-rotation loop will continue indefinitely each time the donation is transferred weekly, until the feature is turned off