Manually Split Donations - Step-By-Step Guide
This feature will be live on our Beta platform before it is live on our Production Foodiverse environment.
Instructions for Manually Splitting Donations
Step-by-Step Guide
Initiate Split Donation
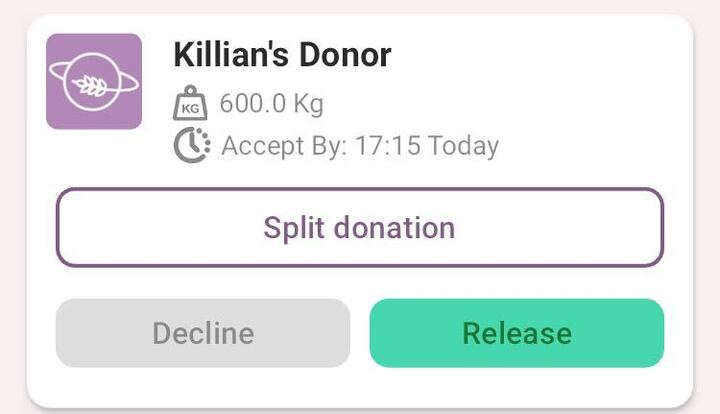
When a donation exceeds the set threshold, it will appear in the Large Donation Holding section on the Foodbank Admin Dashboard.
Locate the pending donation that needs to be split and click on "Split donation."
Choose Charities for the Split Donation
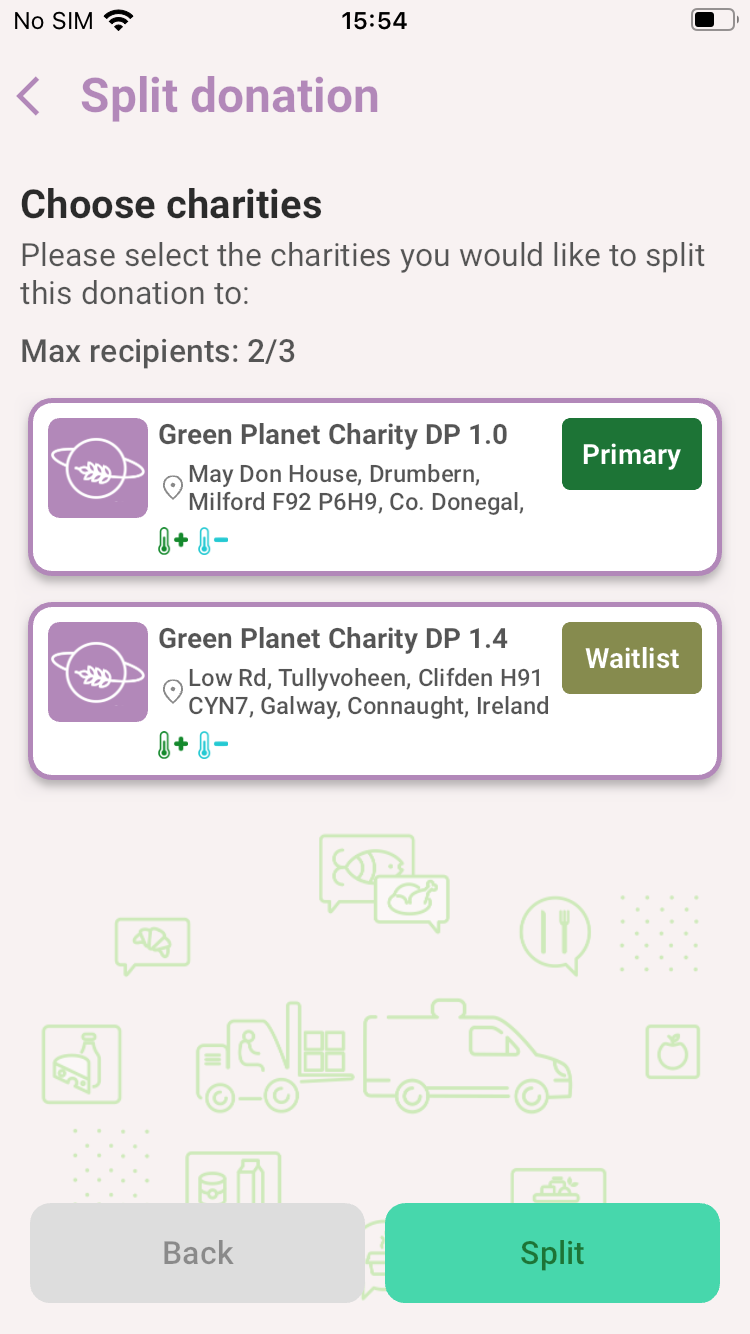
In the "Split Donation" window, you will see a list of available charities.
Select the charities you want to split the donation between.
Consider each charity's capacity and acceptance status.
Ensure that the maximum number of recipients (3) is not exceeded. If it is, an error message will be displayed.
Enter Donation Details
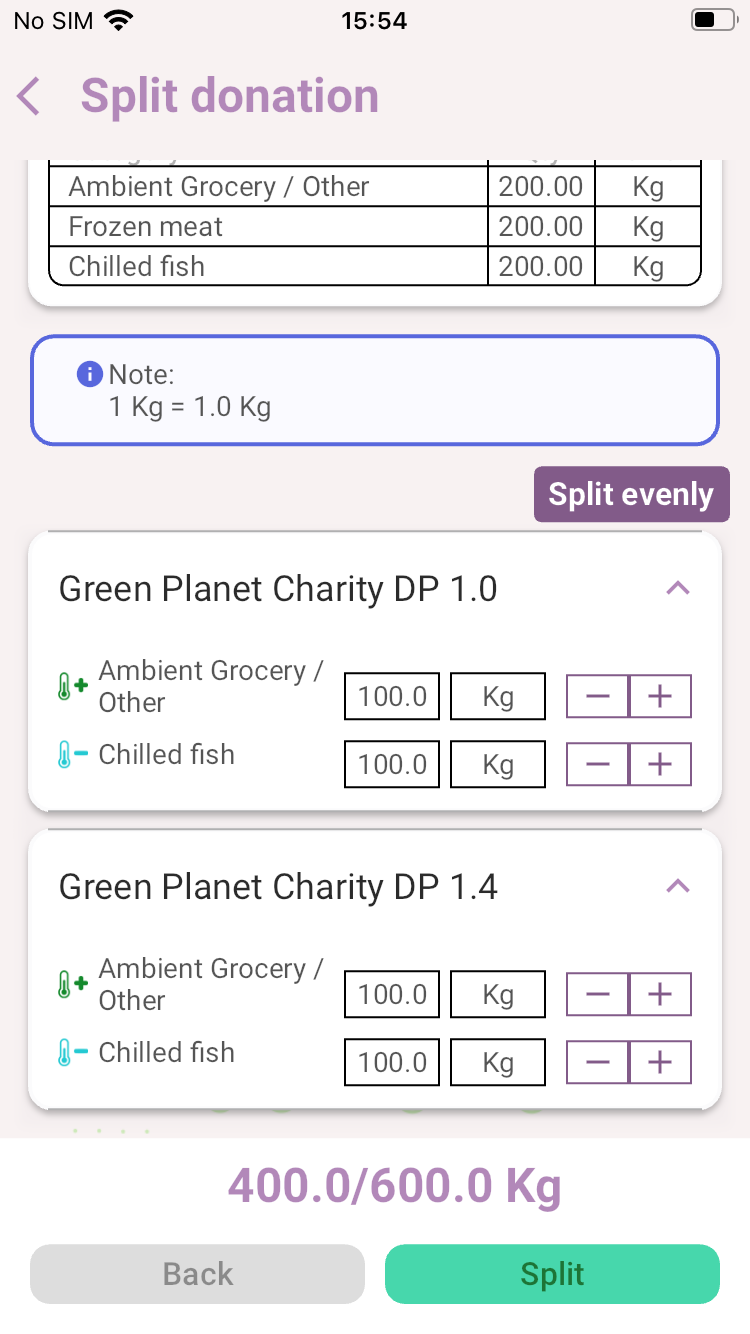
Input the quantity of each category (e.g., fresh fruit, vegetables) for each selected charity.
Ensure that the sum of the quantities matches the total donation amount.
Use the "+" and "-" buttons to adjust the quantities as needed.
Make sure the total allocated quantity does not exceed the available donation amount.
For larger donations, use the "Split evenly" option to automatically distribute the items equally among the selected charities. The "Split evenly" function distributes the total quantity of each item equally among the selected charities.
Confirm Split
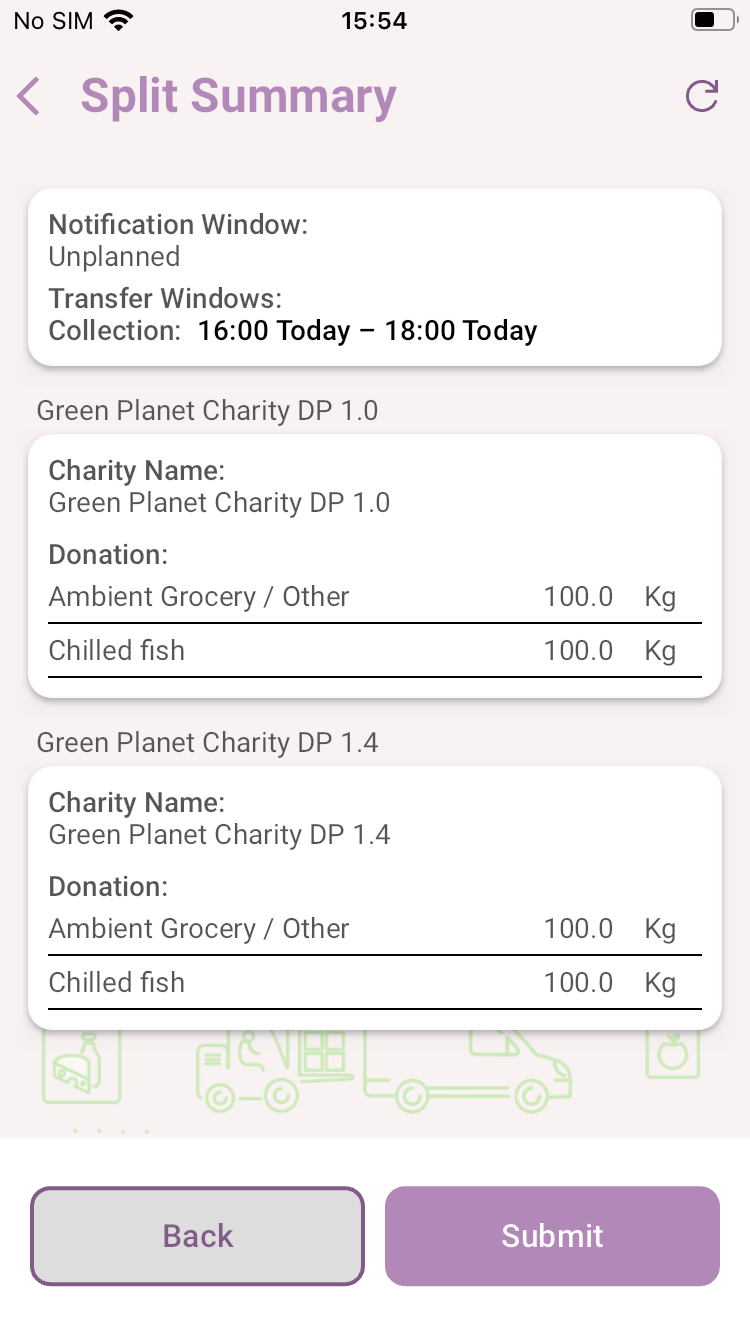
Review the split summary and confirm the distribution.
Ensure that you want to submit the split donation by confirming the prompt.
Once the quantities are allocated, review the split details in the summary section.
Check the notification window and transfer windows to ensure the timing is correct. The notification window is the timeframe within which the charities need to respond, and the transfer windows are the scheduled times for donation transfer.
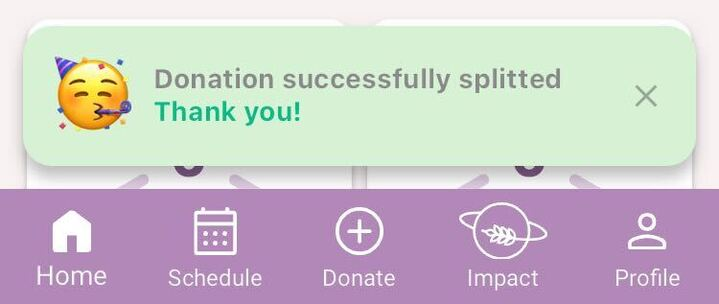
Click on the "Submit" button to confirm the split donation. A confirmation pop-up will appear; click "Proceed" to finalize the split.
Submission and Tracking
Submit the donation for splitting and send it to the relevant charities.
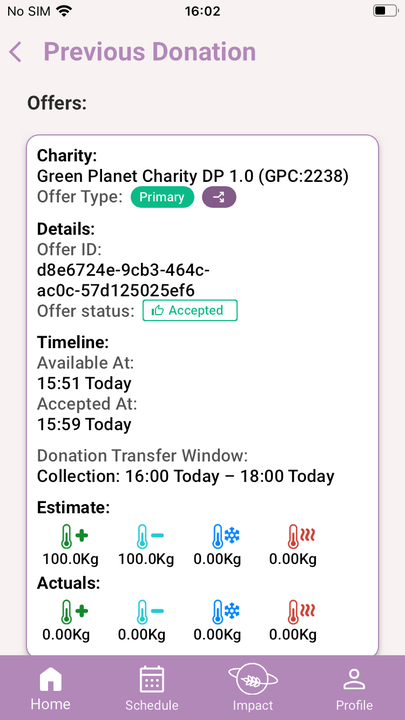
Check that the split donation is now visible in the "Donations History" for each involved charity.
Track the status updates in the Donations History to manage split donations.
Wait for charities to receive notifications for the new pending actions and accept or decline the donations.
Track the status of the split donations through the dashboard and make any necessary adjustments if a charity declines.
Handling Errors and Declines
If an error occurs during the allocation, correct the quantities and try again.
Declined food will be offered to the Foodboard as per the VIP window settings.
A charity that has rejected a split donation offer will not see this donation on the foodboard
Technical Touchpoints
Ensure the Foodnet settings for max capacity and approval are correctly configured for each charity.
Verify that the Foodbank Admin Dashboard is updated to reflect the new split donations and their statuses.
